Guitar / Uke Finishing Schedule

My finishing schedule has been adapted through many attempts with a variety of finishes, and is suited to hand-applied finishes, and gives predictable results.  This is more difficult than it sounds.  Elsewhere I may list the combinations that didn’t work, and why – for now, here is what I do.

Start by sanding everything to at least 400 grit, starting with 80 and going through 120, 220, up to 400.  Some parts come off the drum sander which runs a 60-grit belt, and extra thickness, a few thousandths, must be left on the material to allow for sanding back through the deep scratches from the drum.  I use a cabinet scraper interchangeably with sanding to level and smooth surfaces.

Wipe down the surfaces to be finished with a tack cloth, and apply a coat of de-waxed shellac.  Shellac that is pre-mixed and sold in cans usually contains wax which makes it unsuitable as an undercoat for oil or other finishes.  If you use pre-mixed shellac, it must be identified as ‘de-waxed’ – this is usually only found in pre-mixed shellac marketed as a ‘sealer’.  Shellac is available in dry form as flakes, and these are also both ‘waxed’ and ‘de-waxed’.  If you mix your own shellac from flakes, use de-waxed flakes and dissolve in solvent alcohol at the rate of about 1 pound of flakes to 1 gallon of solvent alcohol, making a ‘1-pound cut’.  This is a pretty fluid consistency suited to sealing.  I use disposable foam brushes and apply the shellac to cover without runs.

The purpose of the shellac is to seal the wood, raise the grain for the final sanding, and provide a substrate that lets my oil-based top coats dry on oily woods.  The  oils in some woods used in guitar construction, like rosewood and cocobolo, will prevent oil finishes from curing, indefinitely.  A sealer coat of shellac overcomes this problem.

The shellac is dry in a very short time.  After allowing an hour or so, I apply a pore filler to any woods that are open-pored.  Those woods include mahoganies, walnut, koa, rosewoods; you don’t fill woods like maple, cherry, spruce.  I use a microballoon water-based filler (from LMI) that can be tinted with artist’s acrylic colors.  I smear the filler on with my fingers, wipe most of it off by rubbing a cloth across the grain, and let it dry.  Again, this dries fairly quickly.  Then sand it all off with 400 grit except for what remains in the pores.  This step also levels the grain raised by the shellac base coat.

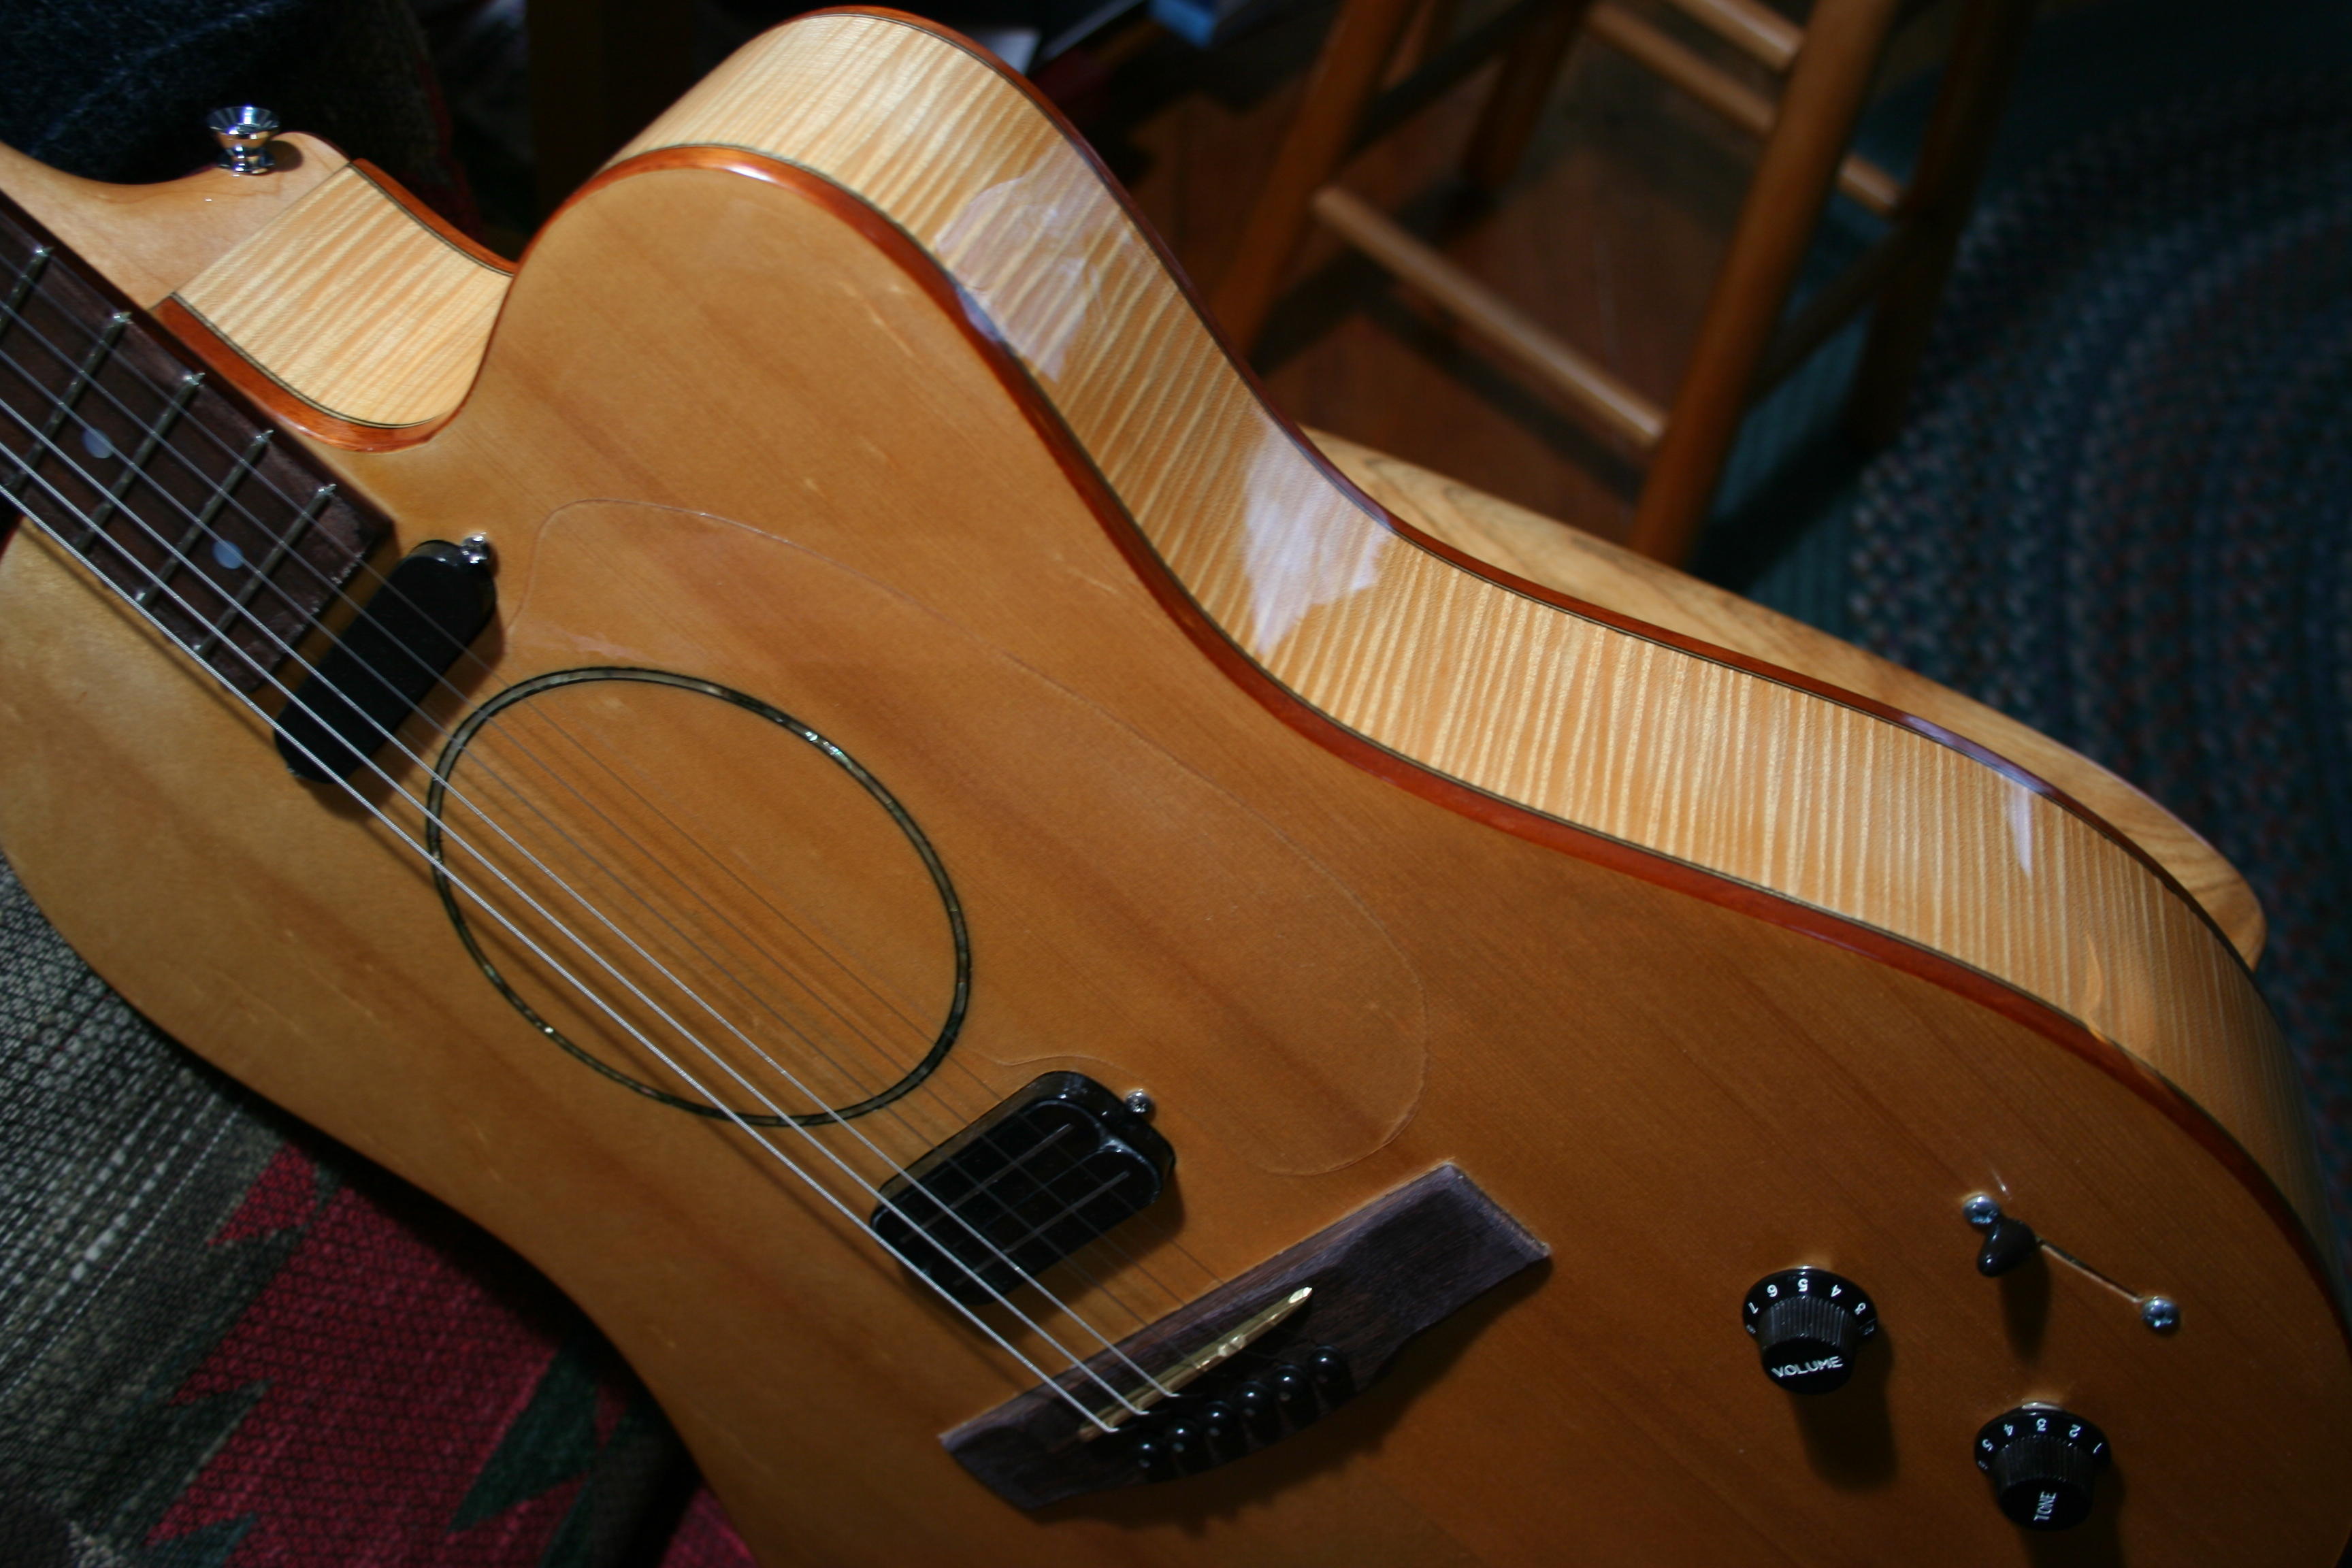
Now the top coats begin.  These number between 3 and 7, depending on how things look.  The object is to build a layer of finish that is thick enough to be sanded level for final polishing out.  I use a marine grade spar varnish.  This varnish is on the soft-side as varnishes go, but applies smoothly by brush and does a nice job of enhancing the natural color of the wood.  The varnish can be tinted with oil-soluble dyes, and small amounts of dye added to each coat will build up a distinctive color cast over several layers.  The dye, when I use one, is first dissolved in paint thinner, and added to the finish in small amounts.  The finish as it comes out of the can is too thick to flow well – it is sold that way to meet VOC compliance – and must be thinned with thinner or turpentine.  I thin approximately 20% – or, one teaspoon of thinner per 5 teaspoons of varnish.  Eight teaspoons of varnish is enough for one coat on a guitar, again, applied with a foam brush.  I use props inserted though the soundhole to support the instrument as it dries.

The varnish takes longer to dry – typically it is dry-to-touch in about 4-6 hours, and hard enough to sand in a day.  On the safe side, I wait at least 2 days between coats before sanding.  This means putting on 7 coats takes 2 weeks.  Sand minimally between coats with 400 grit, and remove any runs.  Repeat until the finish is thick enough.

Now, wait at least 2 weeks.  The longer you wait, the easier the buffing out will be, and the better the gloss.  Sand everything back with 400 grit to level the surface.  Move to 600 grit and sand some more.  Move to 1000 and repeat.  All these final sanding steps are done using water with the sandpaper as a lubricant.  Let the instrument set a couple days.

Switch to autobody buffing compounds.  Go over everything with a ‘medium-cut cleaner’, applied by hand using a soft cloth.  Repeat with a ‘fine-cut cleaner’.   Then go to a buffing wheel with a medium fine polishing wax, and it is done.

IMG_0001
Crossfire #3 – acoustic/electric dual humbucker


Basic Guitar Setup

Guitar setup is intended to maximize playability and assure accurate intonation.  These are the steps to take to determine what to adjust, and whether there are underlying structural problems that must be addressed before correct setup can be accomplished.

Maximum playability means the lowest string action possible without unnecessary fret buzz.  Start by checking neck relief.  Fret any string at the first and fourteenth fret, and check in the middle to see how much space there is between the string and the frets, say, around the seventh fret.  There should be a small amount of space – about 1/32″ or so.  This space is necessary to prevent buzz because the string moves both side-to-side and up-and-down when it is struck.  Assuming the neck has an adjustable truss rod, adjust the truss rod to give the correct relief.

Check a couple strings before adjusting the truss rod.  Both E’s is a good start.  Care must be taken in all steps of setup, especially with truss rod adjustment.  Generally, you can assume that turning the adjustment nut clockwise will tighten the truss rod, adding pressure to create back-bow, reducing neck relief.  This is not always the case, so proceed slowly.  Make sure your wrench/allen key or other tool fits the rod nut tightly.  Backing off a truss rod nut, turning counter-clockwise, is usually easier than tightening the rod.  When backing off a rod, you can rely on string tension to bring the neck up, adding relief.  When tightening the rod to reduce excess relief, it is best to use a clamp and block arrangement to bend the neck and then tighten the rod to hold the new position rather than relying on the rod alone to bring the neck back.  Place a small block on the first and 14th frets, place a board across on top of the blocks and use a padded C-clamp to push the back of the neck upwards by springing the neck up between the two blocks.  Go in very small increments and when you see the neck starting to bend, stop, tighten the truss rod a little, and take off the clamp.  Check the relief again.  If the truss rod nut ends up in a ‘neutral’ position, turn it one way or another to put it under a little tension, otherwise it may rattle.

Check string slots at the nut.  Each string, when fretted at the fifth fret, should show a very small amount of space over the first fret.  Slots that are too low will give string buzz on an open string; slots that are too high will make for painful fretting near the nut.  Slots that are too low can be filled in with powdered bone and Krazy glue, and re-slotted.  Get a piece of cattle bone, sand it to make dust and put some dust in the low slot.  Add a drop of Krazy glue and let it set.  File the slot.  Slots that are too high can be filed.  You need a couple nut files to do this, but not a whole array of them.  Two files, one of about 0.013″ and one of about 0.028″ should work – use them side-to-side as needed to make slots wider than their designated size.

Set the action by checking the string height above the twelfth fret.  The open string on the bass side should show around 0.110″ (a little less than 1/8″) space between the string and the 12th fret, and the treble should show a little less – say around 0.090″.  Corrections are made by lowering or raising the saddle.  Raise of lower the saddle by twice the amount that you want to correct at the twelfth fret.  Bone saddles are adjusted by filing to lower, or making a new saddle if they need raising.

Check the intonation.  A string produces a certain pitch at any given length and tension.  Holding that same tension, cutting the length of the string in half produces the octave.    The twelfth fret is theoretically at the halfway point between the nut and the saddle, and therefore produces the octave of the open string.  However, when the string is fretted along its length it is stretched a small amount, and this increases the tension, raising the pitch a small amount.  Intonation is about putting the saddle in the correct position such that each string, when fretted at the 12th fret, produces the octave.  In practice, the distance from the nut to the saddle will be slightly longer than the stated scale length, because of compensation for stretch.   Bass strings are more affected by string stretching than trebles, and steel strings are much more affected than nylon strings.  Guitars with moveable bridges or individually adjustable saddles are much easier to intonate than flat tops with bone saddles set in wooden bridges.  Using an accurate tuner, check each string, and move the saddle so the open string and the octave are both in tune.  On flat tops, adjustments are limited to the width of the saddle, and are made by filing either the front or the back of the saddle for each string as needed.  Because bass strings are more affect by stretching than trebles, you see the characteristic slanted saddle position.

At this point the guitar should play in tune, smoothly and without buzz.  If buzz is apparent, the frets may need to be leveled.  Loose frets that don’t stay down, and heavily worn frets, will create buzz problems for the neighboring frets.  This and other problems will be addressed in a future blog.