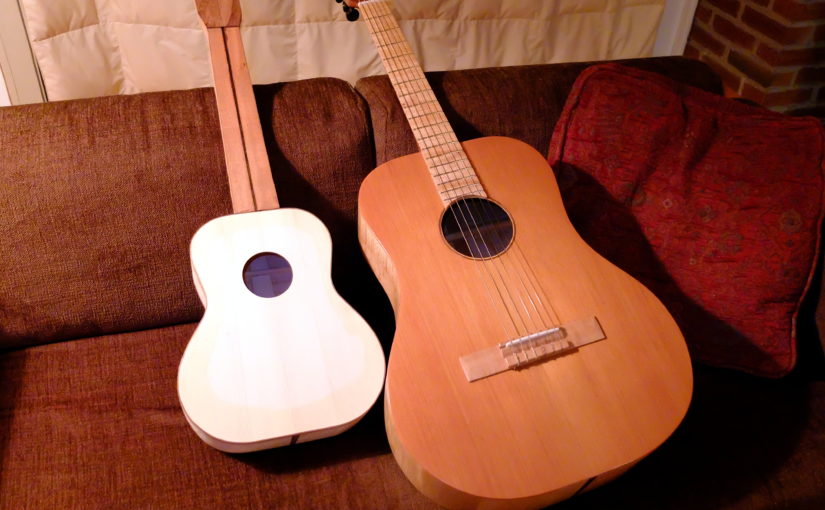
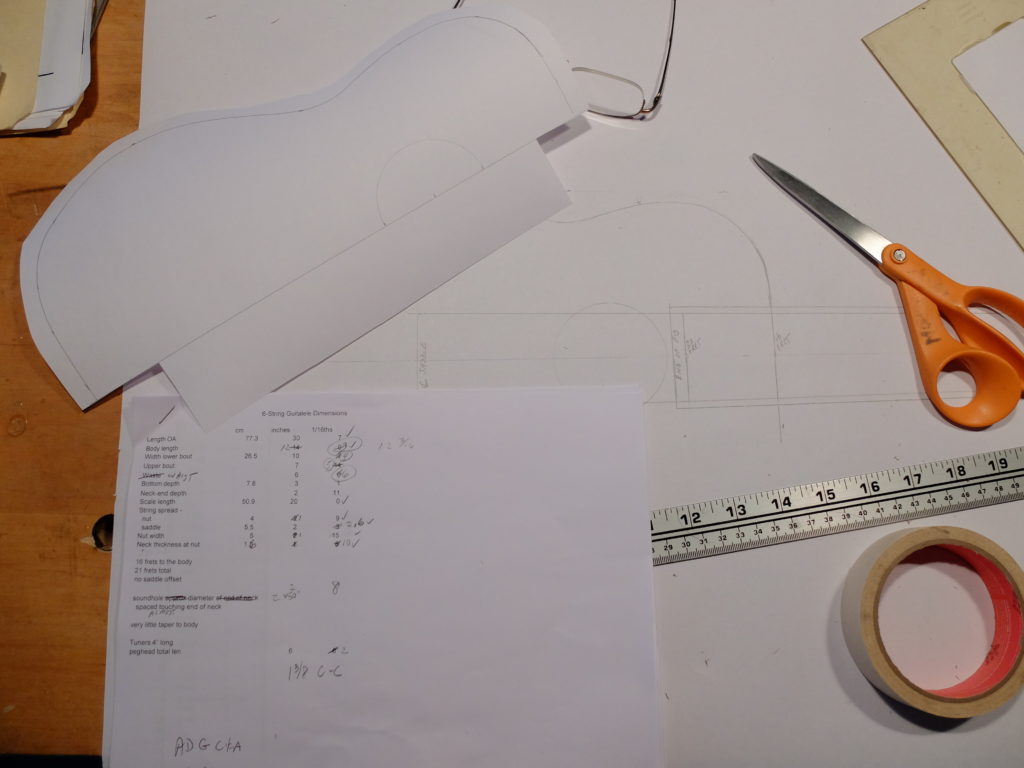
I started thinking about these when I first heard of them last winter and decided to build one after I received an inquiry from a prospective customer. I developed the plans based on similar instruments to be seen on the internet. Below is the table of dimensions I worked up to draw the plans. The plans were drawn out full size and I made a form for holding the sides. 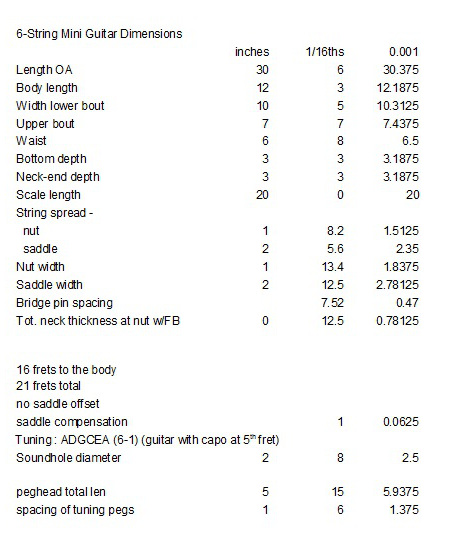
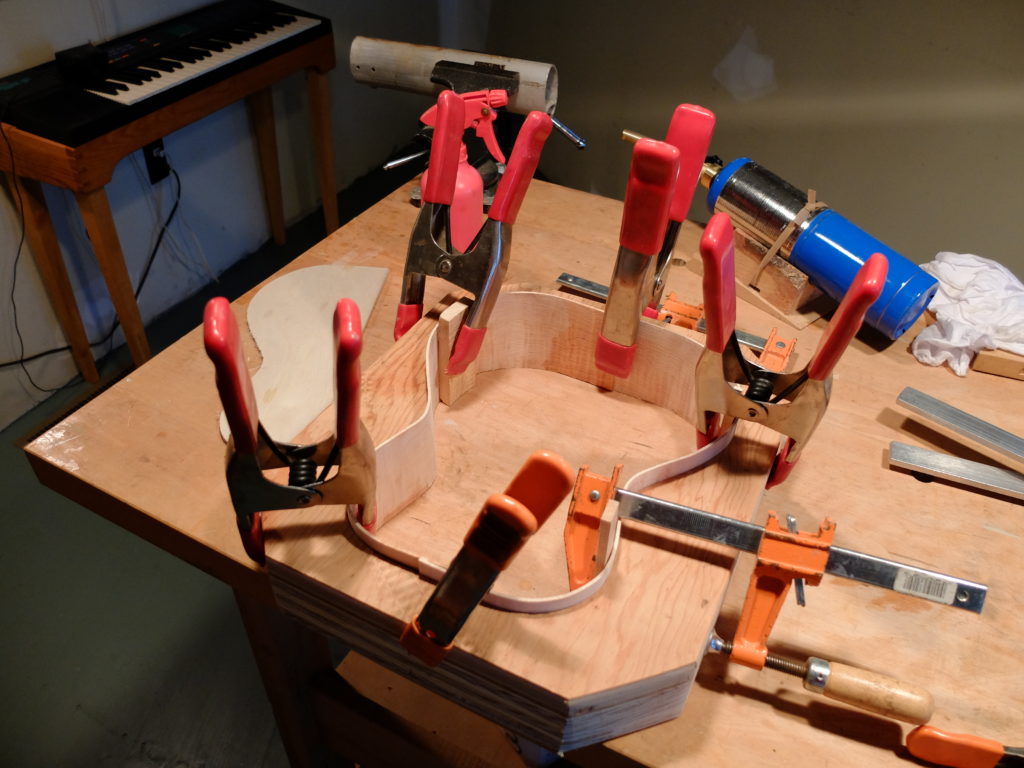
The sides and back are Vermont curly hard maple, about 0.075″ thick. The sides were hand bent on a short section of aluminum sailboat mast heated by a propane torch. I prefer bending the sides by hand rather than using a side-bending machine, for both the aesthetics of handling the wood and the control I have over the bend. The maple bends quite well with lots of heat and a little water.
 The neck blank came from a single piece of mahogany salvaged from a sailboat bowsprit, and is reinforced with a 1/8″ x 3/8″ carbon fiber rod. Below – the sides in the form with the back attached, showing the neck blank with koa peghead veneer and carbon fiber truss rod. I used a straight mortise and tenon bolt-on joint for the neck, using hanger bolts set in the heel of the neck to make the unlikely need for a neck reset easier. Mahogany neck block, spruce on the heel.
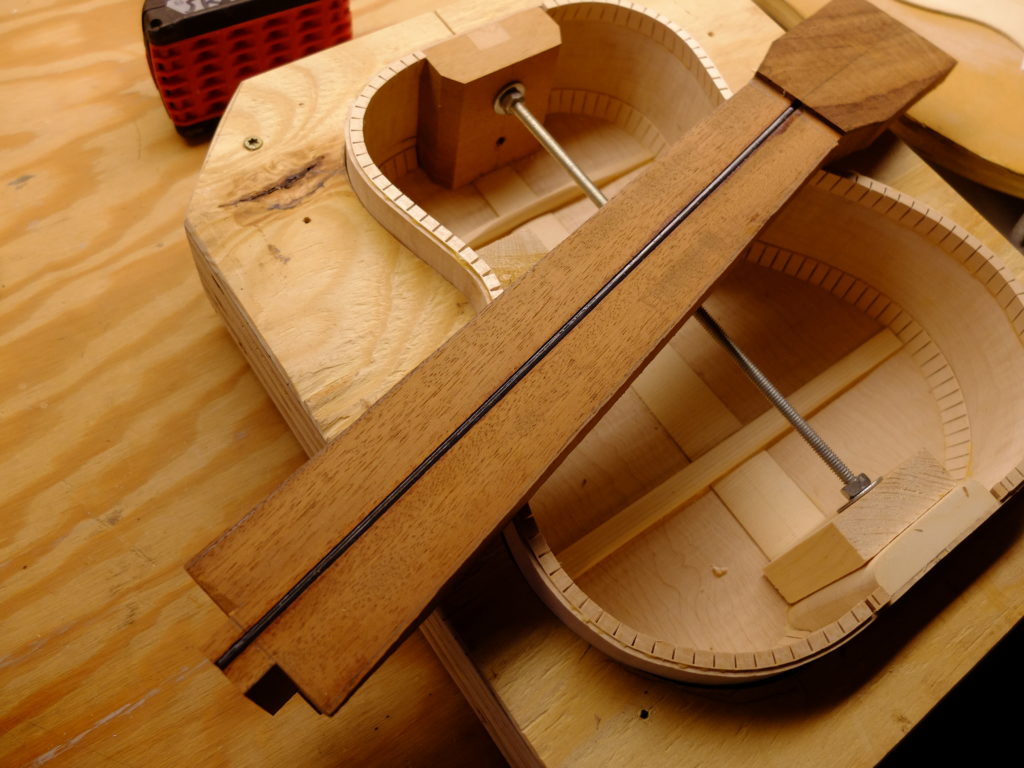 The top is European spruce from a violin set finished to about 0.073″ thick. Since I planned on using a pinned guitar-style bridge, I put in a thin ebony (0.050″) bridge plate to take the ball-ends of the strings. My bracing was intended to provide resistance to torque on the top exerted by the bridge under tension, while giving some flexibility to the top in the area of the bridge, and uses a sort of elevated reduced-contact approach – the 2 main longitudinal braces contact the bridge but are elevated by about 3/32″ either side of it, contacting the top again at the heel and around the soundhole. The two cross braces above and below the soundhole do not contact the longitudinal braces, and the small finger braces below and to the sides of the bridge plate are semi-elevated also.
 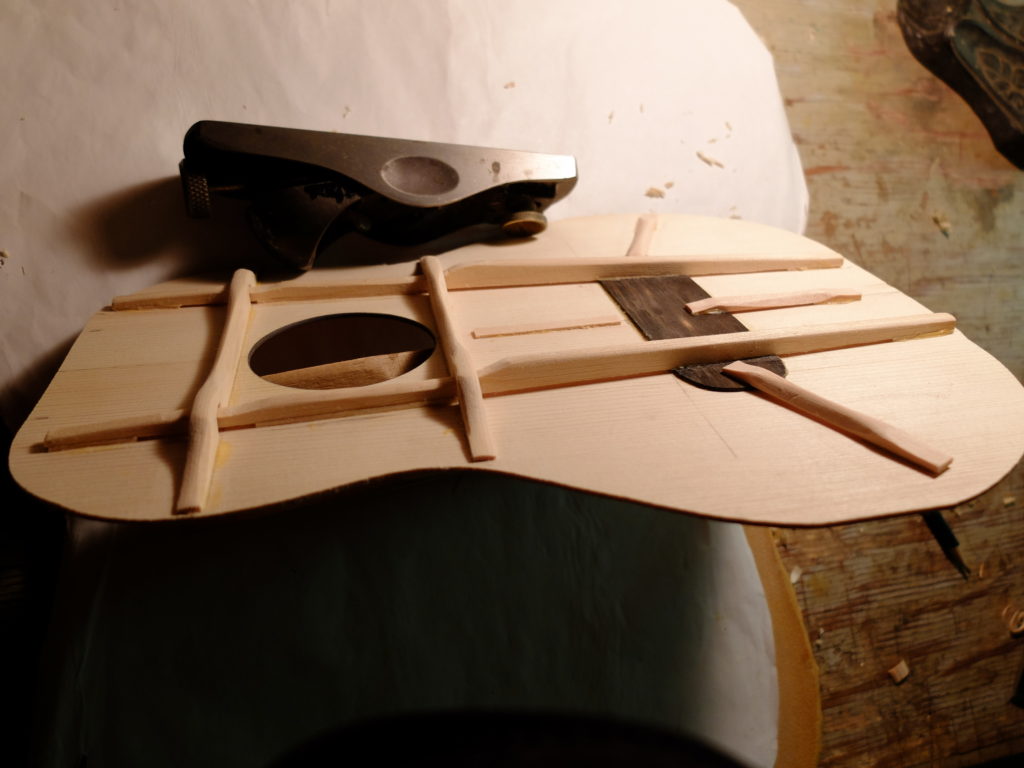 Top glued on, binding on. The binding is black walnut with a black purfling strip.
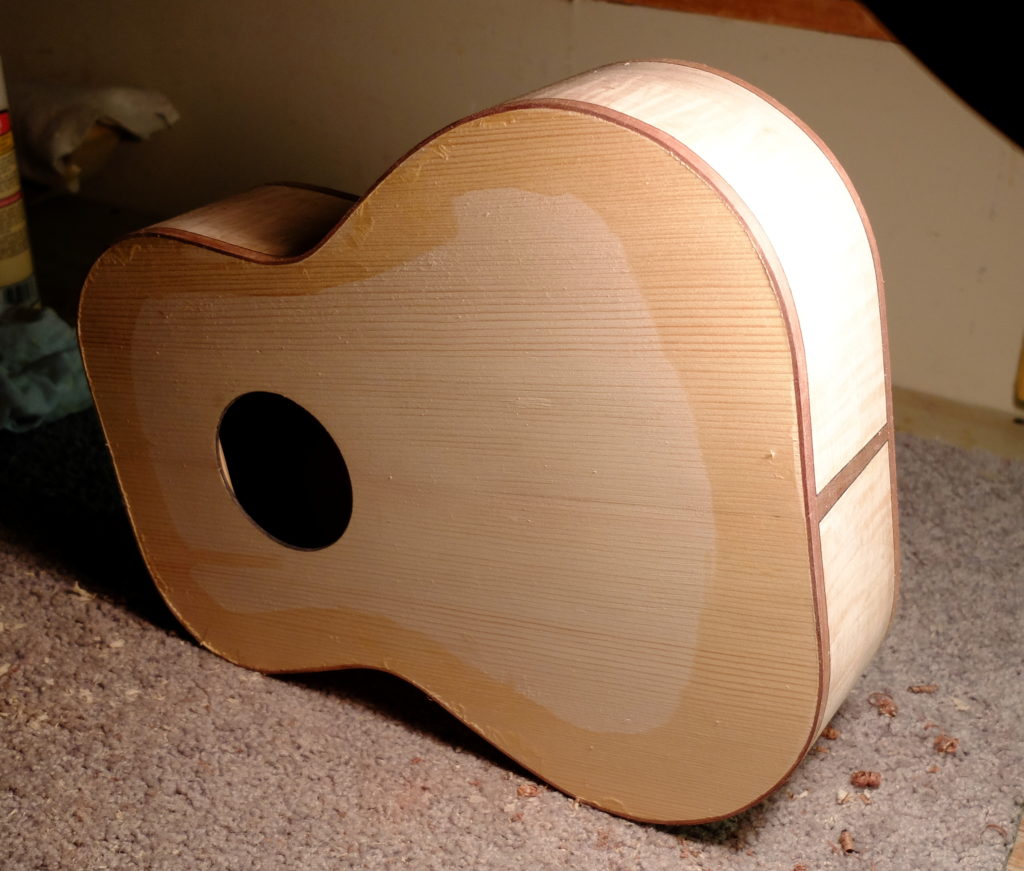 Two stages of carving the neck – after cutting the fingerboard taper (a little wide of the finished size), I cut the thickness taper and then establish 4 cross sections using a semi-circle template.
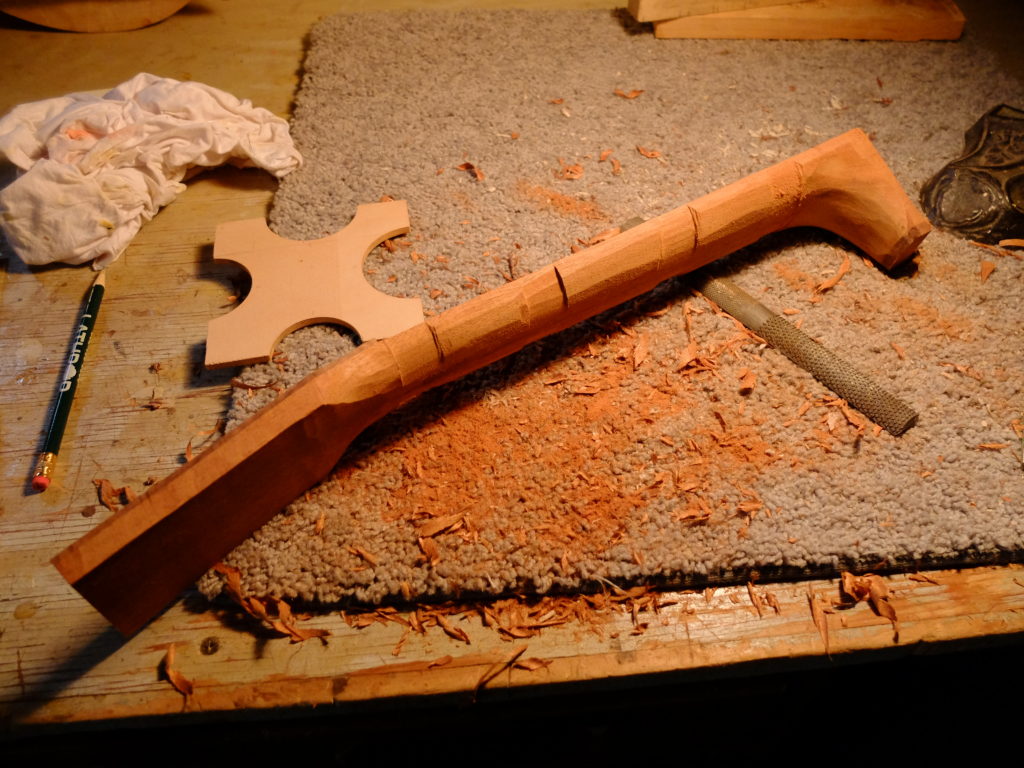 Then it is fairly easy to join the sections
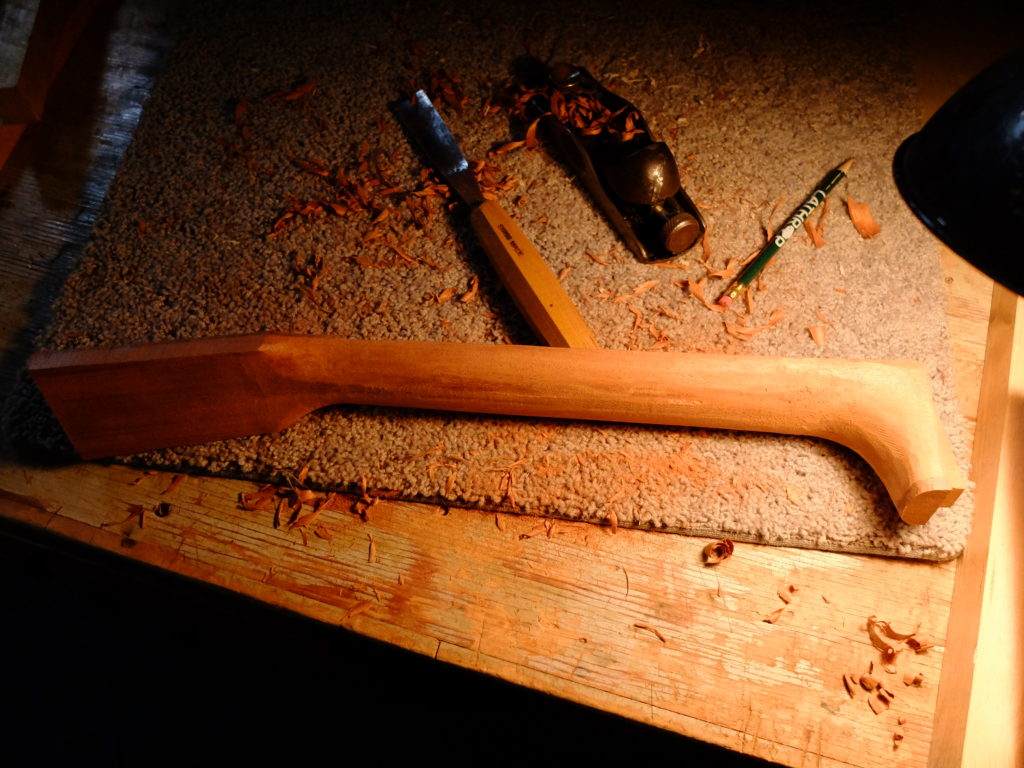 Quite a bit later – Strings are D’Addario Folk Nylon EJ34. I used Tru Oil for the finish, which allowed me to complete this instrument in a much shorter time than would have been possible with a normal oil varnish.
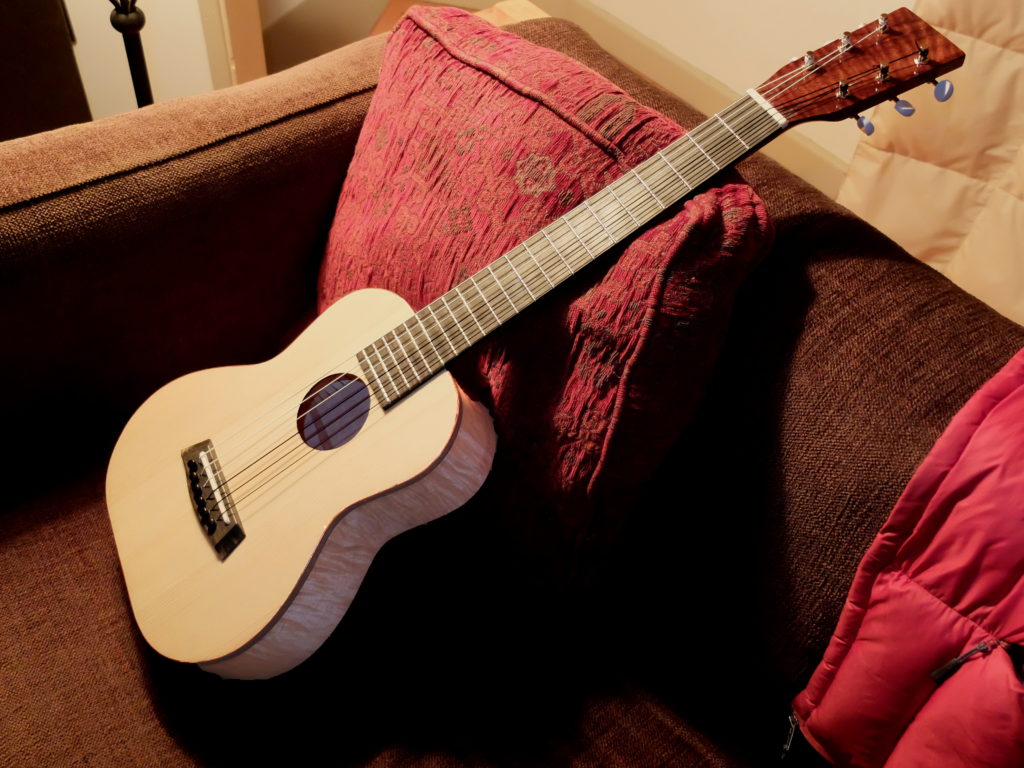
My finishing schedule was : Lightly wipe down entire instrument with damp cloth to raise the grain. Let dry and sand to 600 grit. Apply a sealer coat of dewaxed shellac. Apply pore filler to any open-grained woods – I used water borne microbead filler from Luthier’s Mercantile. Sand back filler and shellac with 600 grit. Start with the Tru Oil. I used a very old well washed clean T-shirt for applicator pads to minimize lint. I applied 4 coats at the rate of 2/day and then sanded out the dust nibs with 600 grit. Apply another 4 coats and sand out to level with 1200 grit. Apply another 3 light coats, sand back level with 1500 grit, and apply another 2-3 coats. Sand back level with 1500 grit. Let it cure for a day or two. Rub out with Meguiars Medium Cut compound followed by Fine Cut compound. You will see witness lines that will disappear when you take it to the buffing machine and buff with something like Menzerna Wax 16. Below – ‘The Witty Irishman’ played by Chris LaPointe recorded directly into a Zoom H4n.