Rubber Bridge Guitar

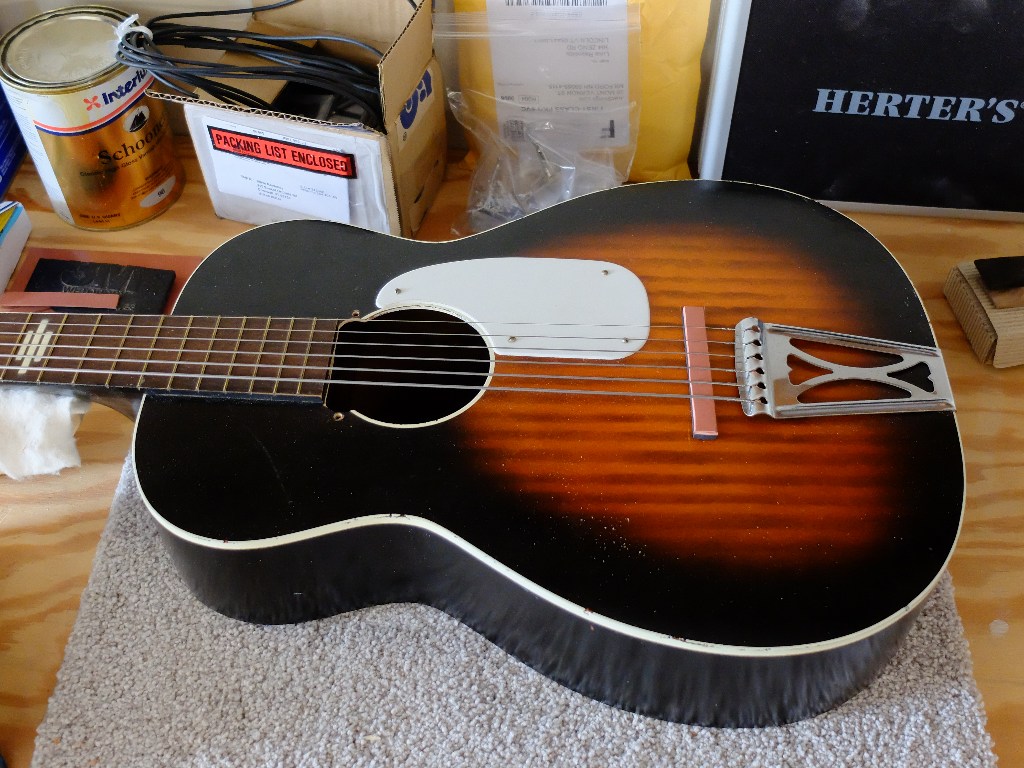
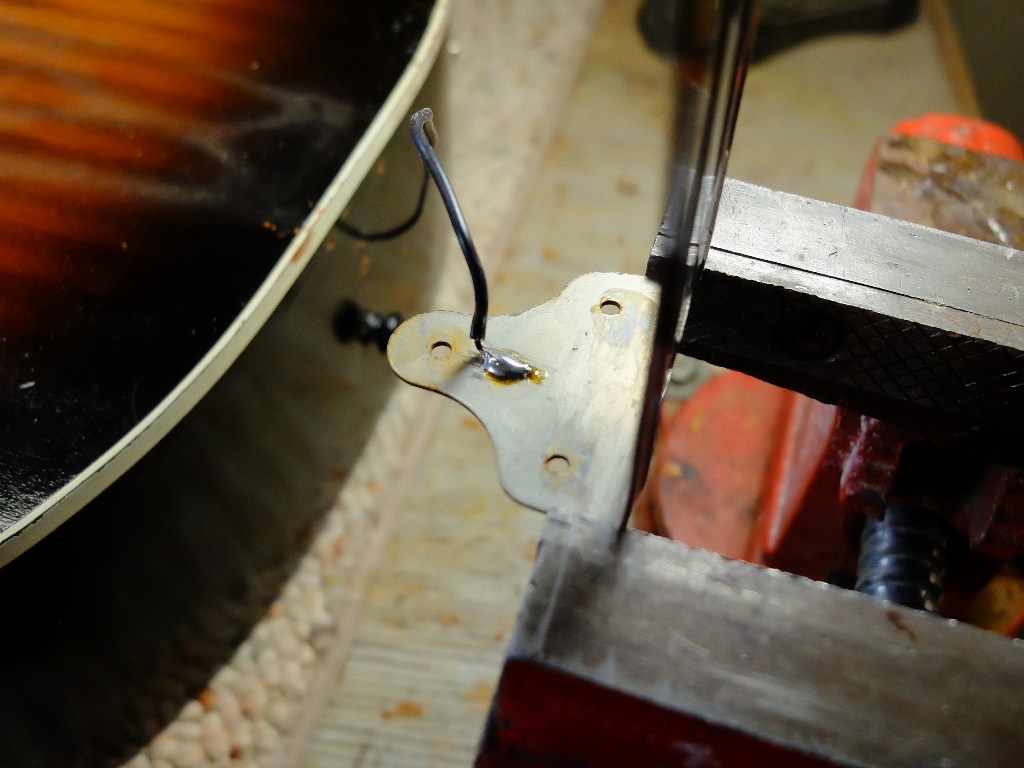
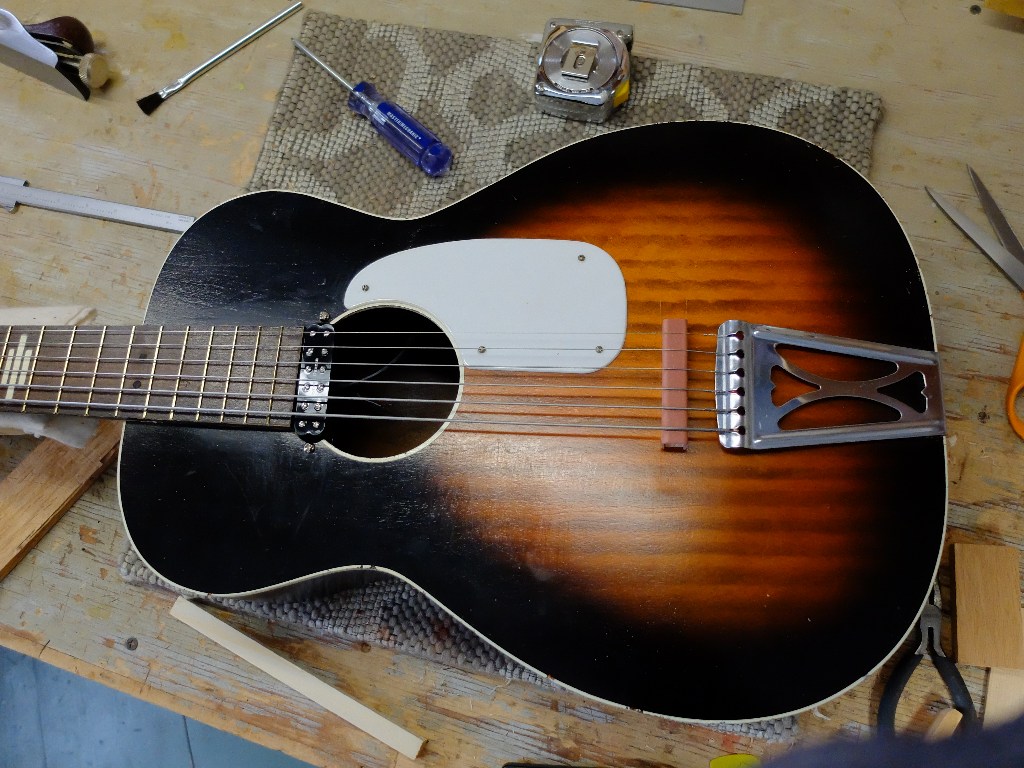
If you buy a rubber bridge guitar it will cost about $1,000, or, for about $250 you can get one of the cheap Stella’s that are mostly used as the base instrument, add a couple pickups, and voila. A client brought me this Stella to convert. To work from, we had one of the guitars that Reuben Cox had put together. Conversion was pretty straight forward. There are two pickups each wired separately to its own jack with no controls, and the wiring needs to include a ground for the tailpiece –

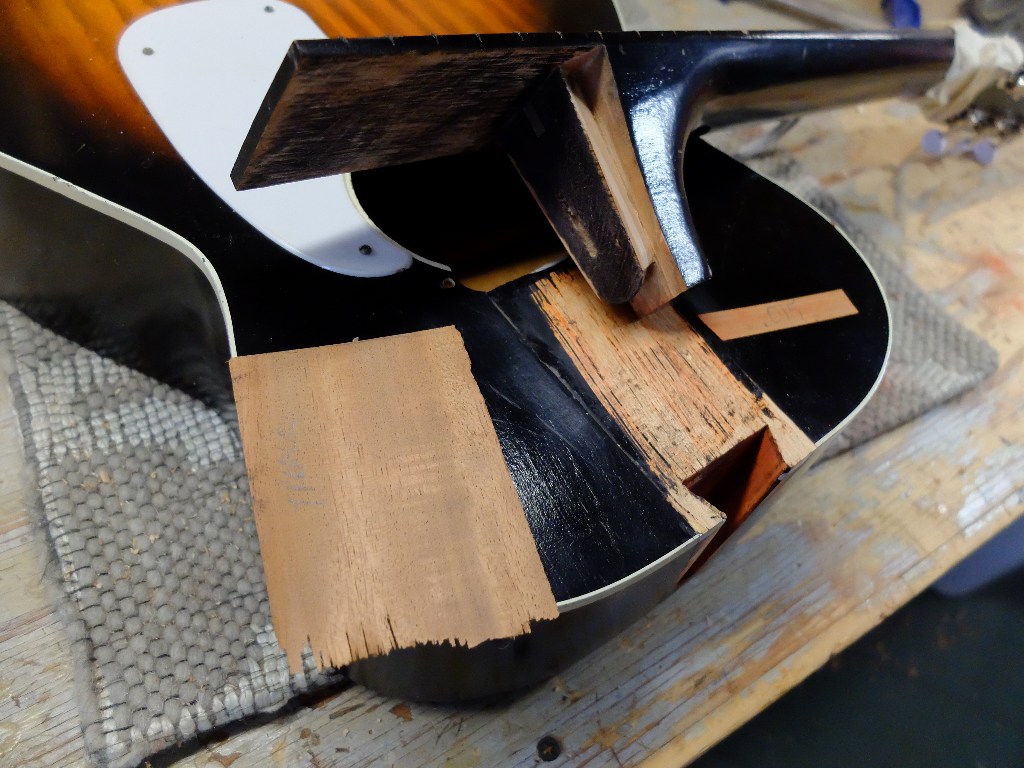
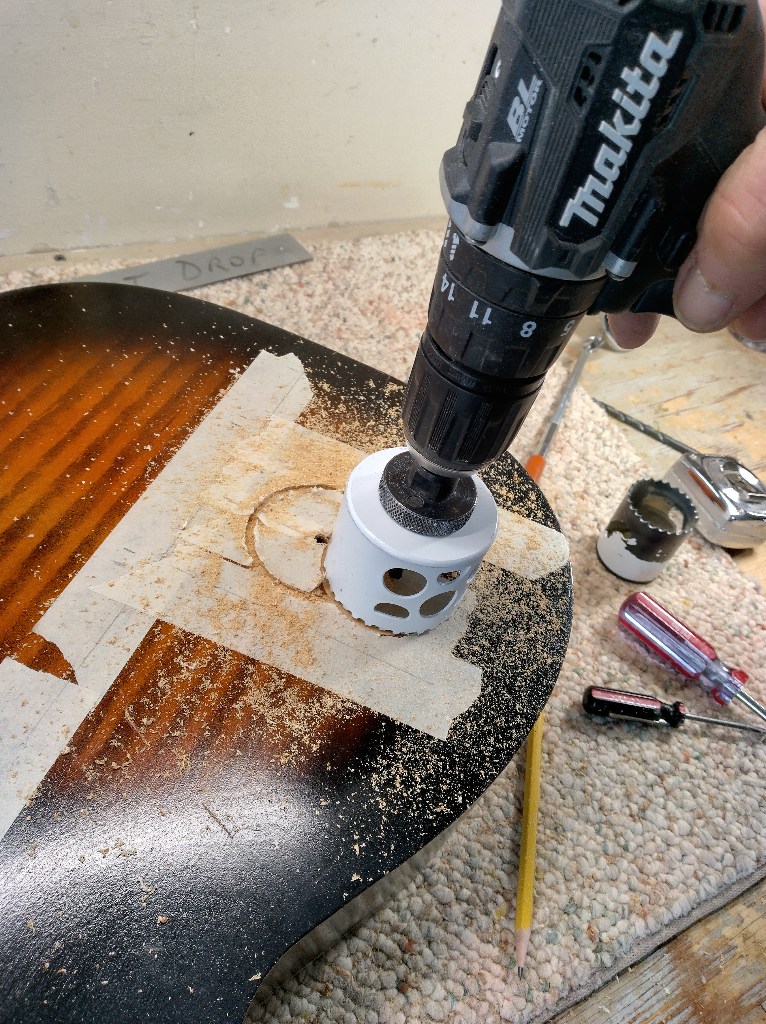
The output jacks are centered in the lower bout on the ‘away’ side – and we found that an access hole on the back greatly assists the wiring, especially since the Piezo pickup placement is determined by a hunt-and-see approach.

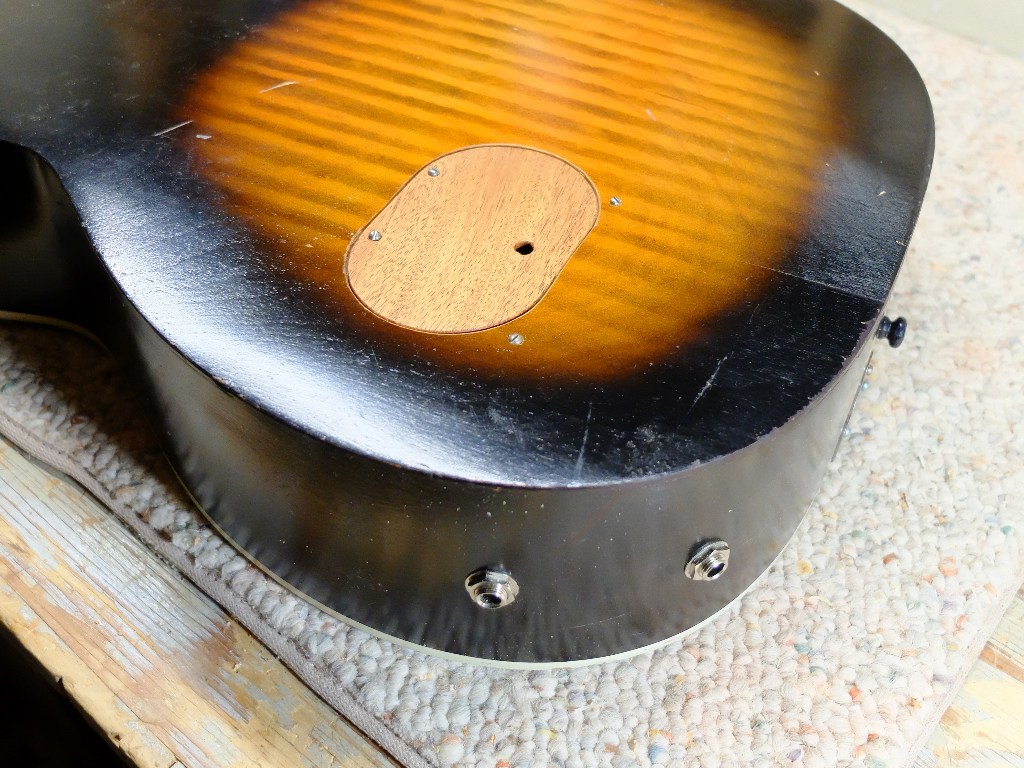
Given the journeyman quality of materials used on these Stellas, I had no problem resorting to the same hole saw I use for roughing in plumbing to cut the access hole.

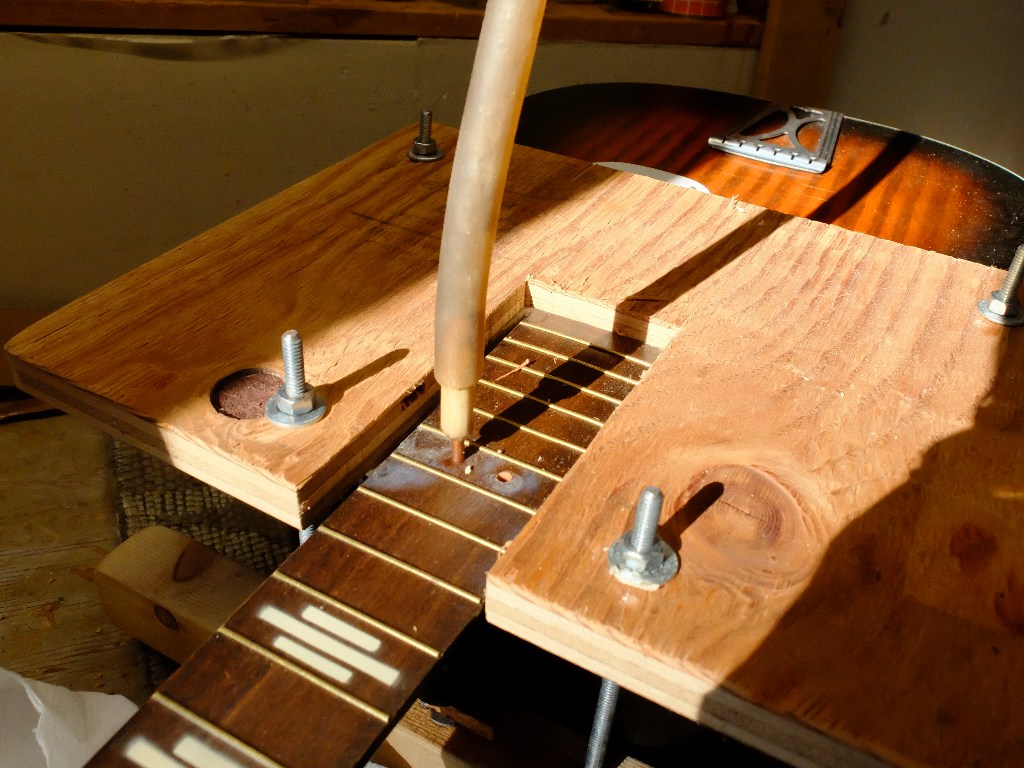
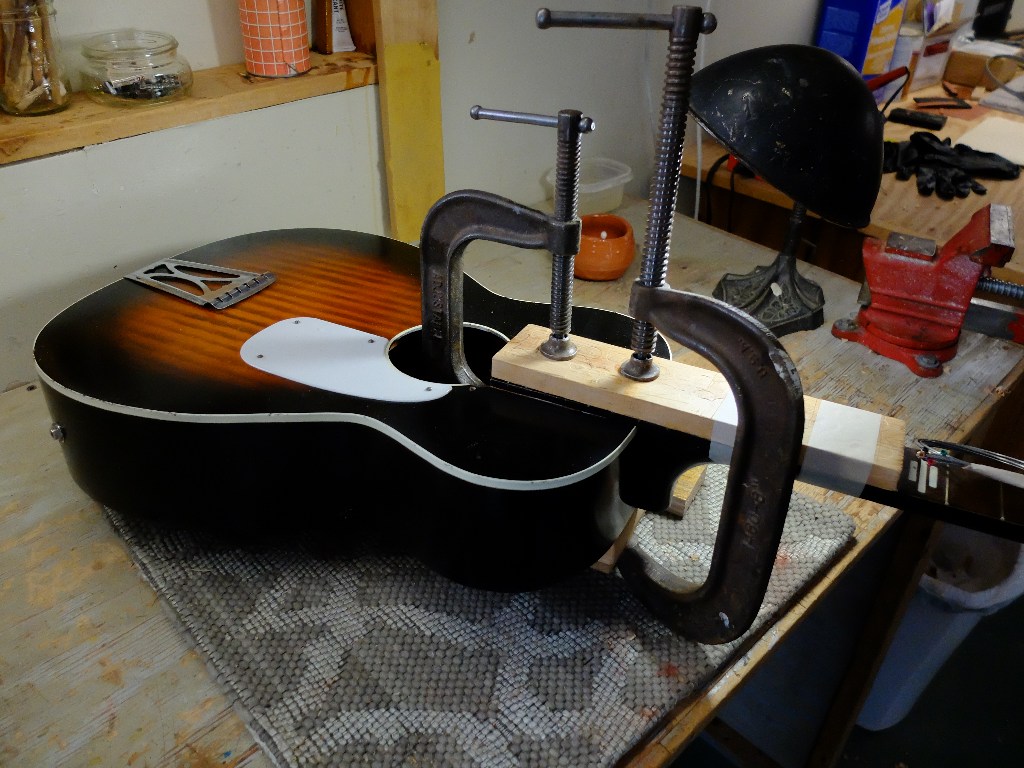
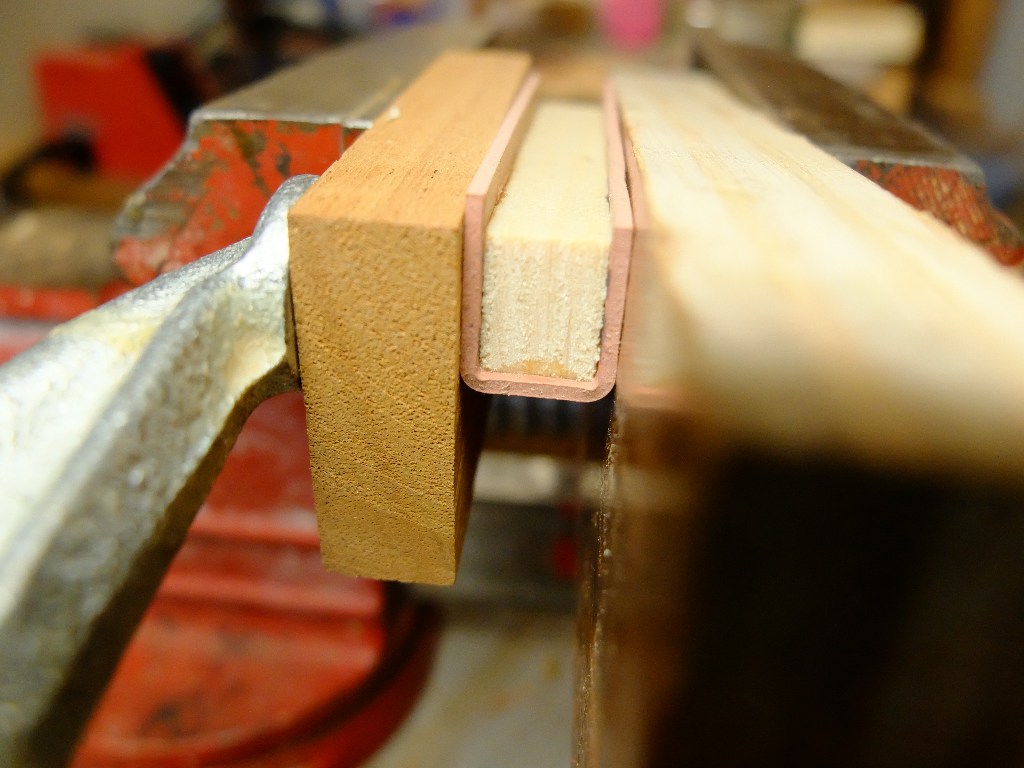
The bridge is made from a piece of pine wrapped in 1/16″ utility plumbing rubber sheet available at your local hardware store in the plumbing section. Picture below of gluing the rubber – cyanoacrylate (crazy glue) works well. I made the pine 3/8″ wide, about 2-7/8″ long and height according to action.

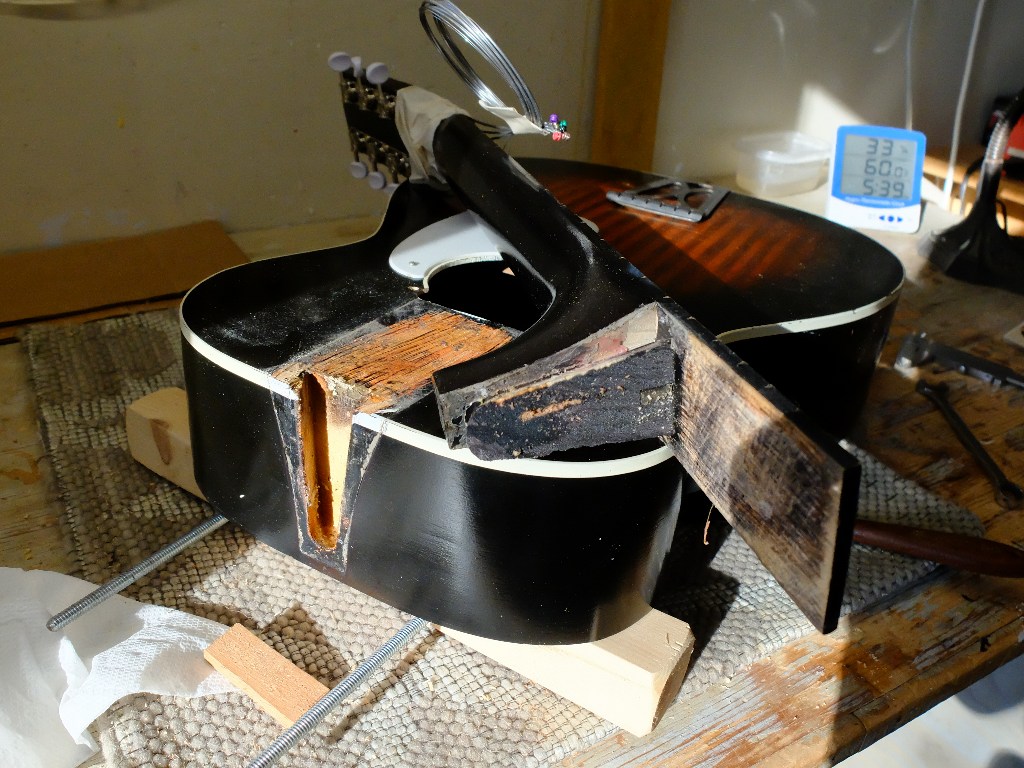
The pickups we used were a K&K Big Shot and a Seymour Duncan ‘lil 59 strat neck position mini humbucker. The fingerboards on the Stellas are flat, so that in theory dictates an adjustable pole-piece pickup, or one with a flat blade, but in our short experience that didn’t matter. The piezo, at least the Big Shot, is very hot and it took two or three trial placements to find one that gave a balanced sound. We used 3M double-sided foam tape, like you might use to attach a wall calendar to your wall, instead of the very thin tape that comes from K&K because we needed to tone the piezo down. The foam tape is removable to an extent allowing trial placements. This one ended up between the bridge and the tail block just to the bass side. The neck pickup is crowded up to the end of the fingerboard and requires some fancy woodwork at that end of the soundhole.

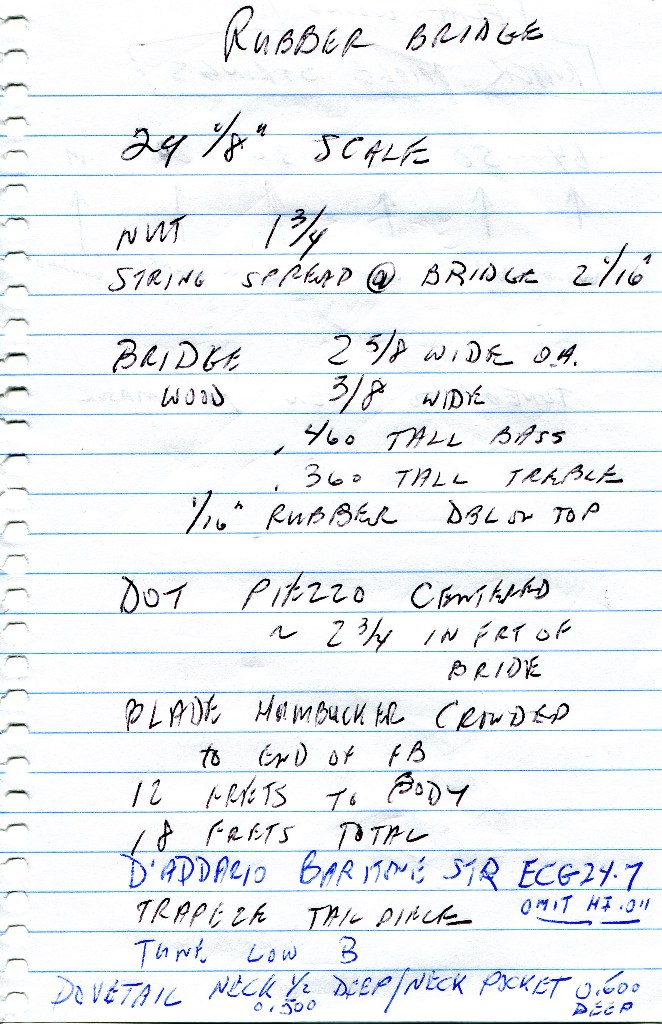
We used baritone strings tuned to a low B, omitting the top string from the flatwound 7-string D’Addario ECG24-7set. Here are my notes from the one we measured. Play the outputs into different amps, etc.

Stella Harmony Neck Reset

A client brought me a Stella Harmony to convert to a rubber bridge, and it needed a neck reset. I will cover the rubber bridge conversion in another post, but wanted to show the neck reset itself. These are incredibly cheaply made instruments with plywood top and back, braces just short of 2×4 framing, liberal use of adhesive like hot-melt glue, paint-on binding – which is why they are the favored base instruments for the rubber bridge conversion. The rubber bridge intentionally avoids resonance and overtones; the deader the better. The fact that the Stellas are common and inexpensive helps. This particular instrument cost $225 with case and shipping. Paying luthier wages to reset a neck doesn’t make a lot of sense – in this case, a DIY project makes it doable.

This is a normal neck reset. Unglue the fingerboard tongue, steam the dovetail, pop out the neck, refit and reassemble.

I use a clothes iron to heat the fingerboard tongue with some cardboard to protect the top finish, and then work a seam separation knife under the tongue.

Knowing the size of the dovetail helps with where to drill the steamer access holes – this dovetail is 1/2″ deep, so holes drilled about 9/16″ in from the body joint hit the space between neck and body pocket. I was not concerned about hiding the steamer needle access holes, just plugged them when finished. In keeping with the basic aesthetic of the whole instrument.

I made my own neck disassembly press out of plywood, padded at top and bottom contact points with cork, and held together with redi-rod, with a press bolt for the heel of the neck. Applying increasing pressure on the bolt pops the neck out as the glue softens.

I needed to add material to both sides of the neck dovetail to get a good fit, and a rather hefty shim under the tongue to get gluing contact with the top. These tapered shims that go to nothing are made on my thickness sander using a tapered backup block. I always use shims for the dovetail fitting, and colored chalk to see the contact points, starting with a shim that allows a snug hand-press fit that completely seats, and then making a shim .005″ thicker for the final glue up.

Once back together, the frets needed dressing. There is no adjustable truss rod, so whatever bow the neck had remains. Working on one of these is like an old house – you have to decide when to stop tearing things down and live with what you’ve got.