I spent many more hours planning the fiberglassing step than it takes to actually do the work. Handling the epoxy/fiberglass can be tricky and the consequences of messing up are serious in several ways. The materials and methods I used were gleaned from advice and books and on-line videos, and none of the steps I took were either pushing the limits of the materials or outright experimental.
Materials used :
- 30 yards 6 oz. x 42″ fiberglass cloth, shipped in a roll (not folded)
- System Three Silvertip epoxy, 2 gallons resin, 1 gallon slow hardener (actually used 2 1/3 gallons), with metering pumps
- ACE hardware wood filler
- WEST 407 filler, 1 can
- WEST 800 rollers – used 6; disposable roller pans and roller frames
- two or three 6″ squeegees
- dozen 3″ chip brushes
- mixing containers (quart yogurt cans) and grunge cups (12 oz. paper coffee cups)
- half a sleeve of good quality 120 grit sandpaper
- quart Pettit EZ Prime 6149 topside primer
- two quarts (750 ml) Epifanes Yacht Enamel, applied with high density foam rollers
- three quarts Interlux Schooner Varnish #96
For sources, I relied on Ted Moores’ book Canoecraft, on Epoxy Basics by Russell Brown, on-line videos by Nick Schade, and advice from Jerry Stelmok, Paul Labrie and Dale Tobey.
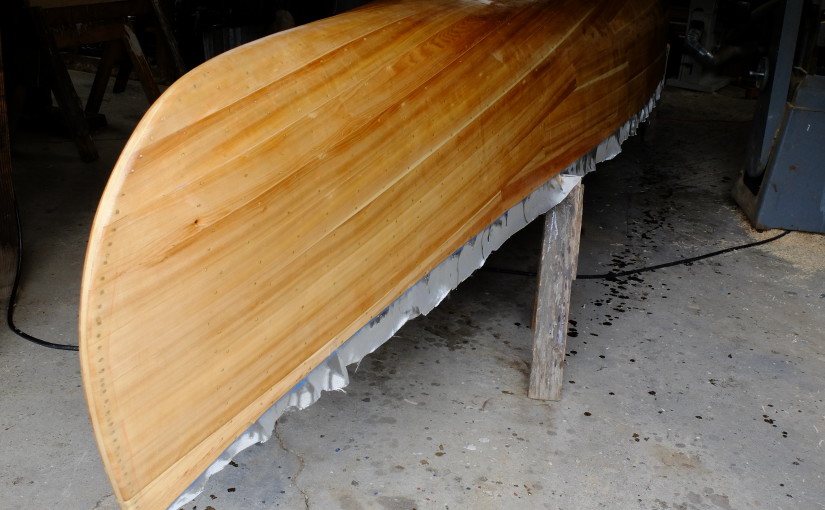
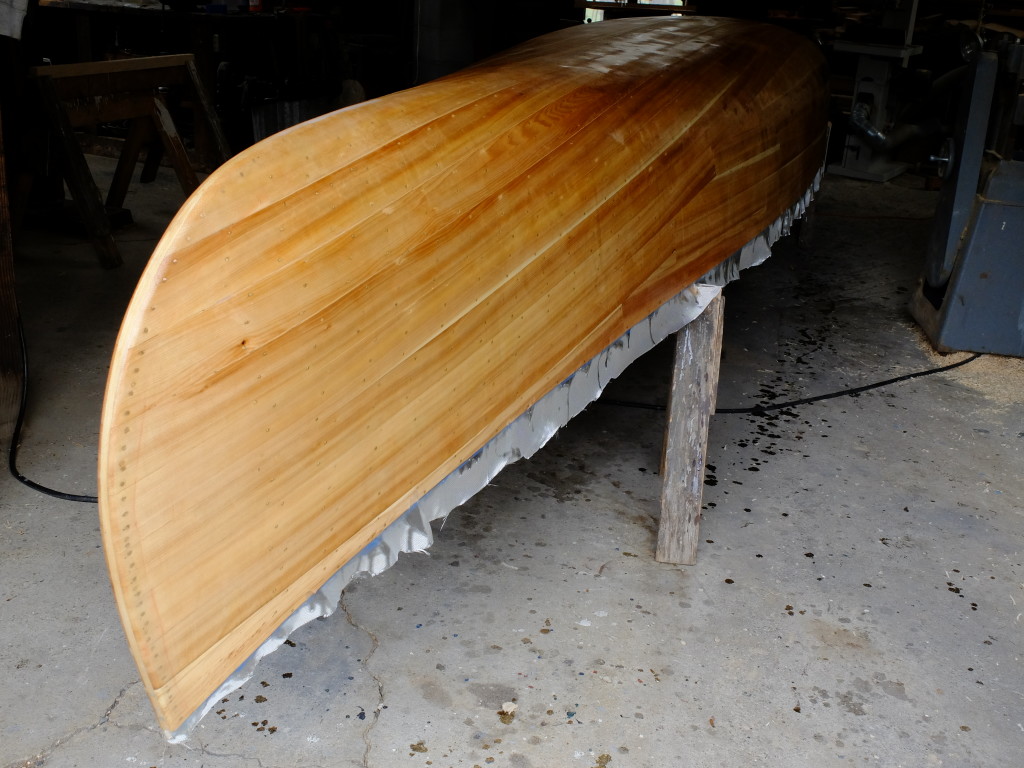
Starting with the bare hull, Jerry advised me to used a filler to plug any holes/spaces in the bottom that would let epoxy drip into the inside because the water-thin epoxy will make a real mess if it runs through the cracks and makes icicles inside. He suggested Ace Hardware 18932 water-based filler, which handles a lot like Durham’s Water Putty, but without the need to mix it. The filler itself has little strength – you just want it to stay put until the bottom is sealed from inside and out. I went over the outside of the bottom and filled any voids, then gave the inside of the boat a couple varnish coats to lock the filler on the inside. This would not work on a boat without tight planking – a lot of filler would be forced inside making a mess. With the boat bottom-side up, I then faired and sanded the outside, and rounded the edges of the transom and stem.
The System Three Silvertip epoxy with the slow hardener has a long working time, sands cleanly, can go up to 72 hours between coats and still get a chemical bond, is low viscosity specially formulated for laminating, has a wide temperature curing range, is tolerant of a wide humidity range, and has no amine blush. The only downside is the cost – it is twice as much as some other epoxies. It takes about 2 1/2 gallons (resin and hardener combined) to layup and coat the two layers of 6 oz. fiberglass 40″ wide, lapped 2″ at the keel. I got my glass from Raka; don’t get it folded – have it shipped rolled and be sure it is compatible with epoxy. For applicators, I used 6″ squeegees, 7″ rollers from WEST (part #800), and 3″ bristle chip brushes.
Once the boat was sanded fair, the bottom was given a single sealer coat of epoxy to prevent the first layer of glass from getting resin-starved, applied with a roller. My shop this time of year (early May) runs up to 70 degrees during the day and dips down into the low 40’s at night – but the Silvertip had no problem with an overnight setup. Warming the resin and hardener before mixing by keeping the containers in buckets of warm water helps.
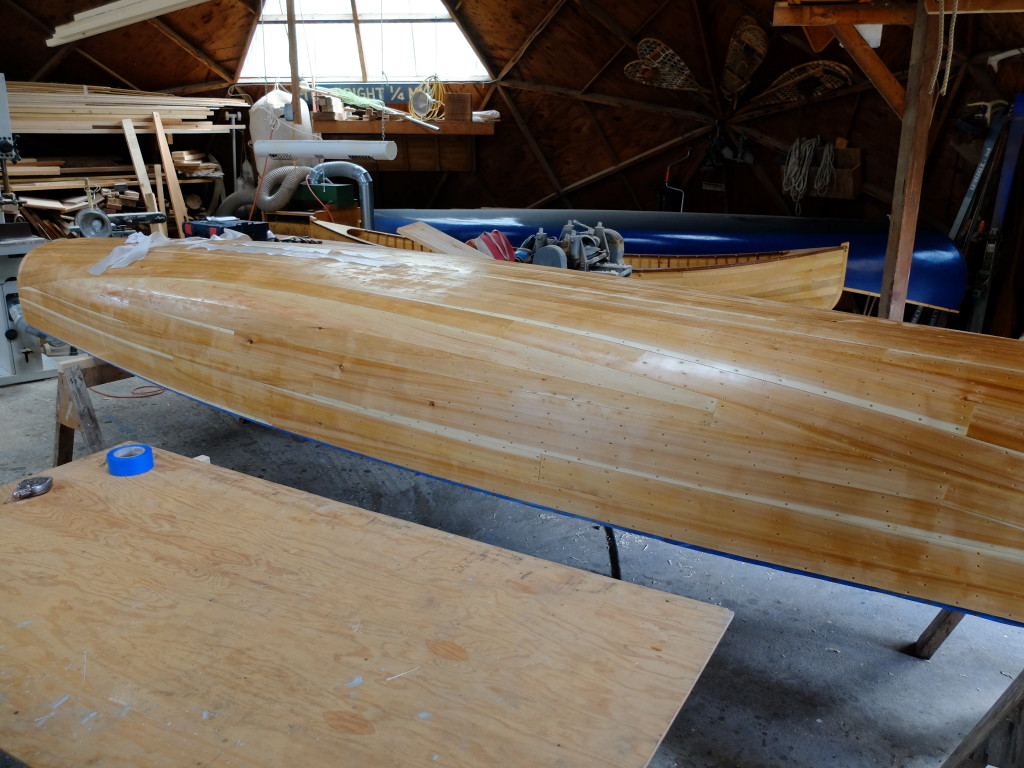
I found it easy to handle the places where the 6 oz. fiberglass would have to bend around the transom and the stem, having taken the precaution to round over the sharp edges. My transom has a recess cut around the periphery to receive the fiberglass. The first layer at the bow and stern, was a piece of 4″ bias-cut tape. This went on cleanly, and the next two full layers of cloth were just wrapped around as I went. Below is the transom with the first piece of tape in place – used a brush to apply the resin and work the glass around the corner.
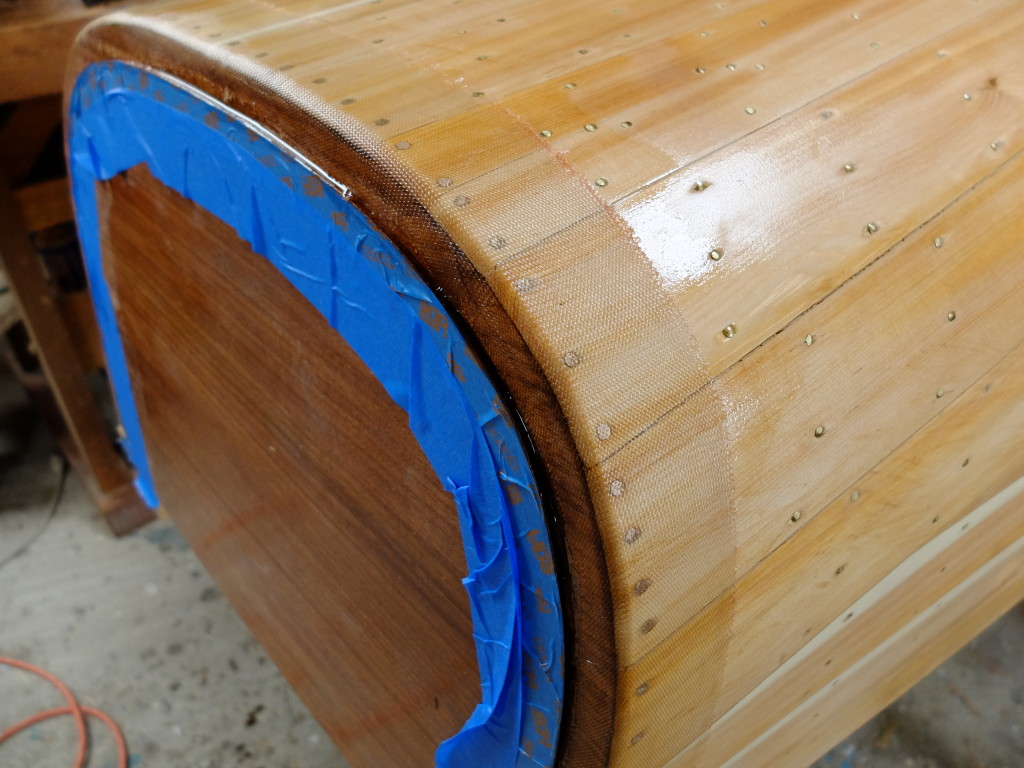
Tape on the stem – you can see a little of the Ace filler. It would have helped to go back over this with a squeegee to clean up the drips.
The cloth, unrolled and smoothed to the hull, ready for epoxy. Use a dry brush to smooth out the wrinkles, not you hands. The first layer (on the left, below) is temporarily held down the keel line with tabs of blue tape which got removed after the layer on the right was positioned.
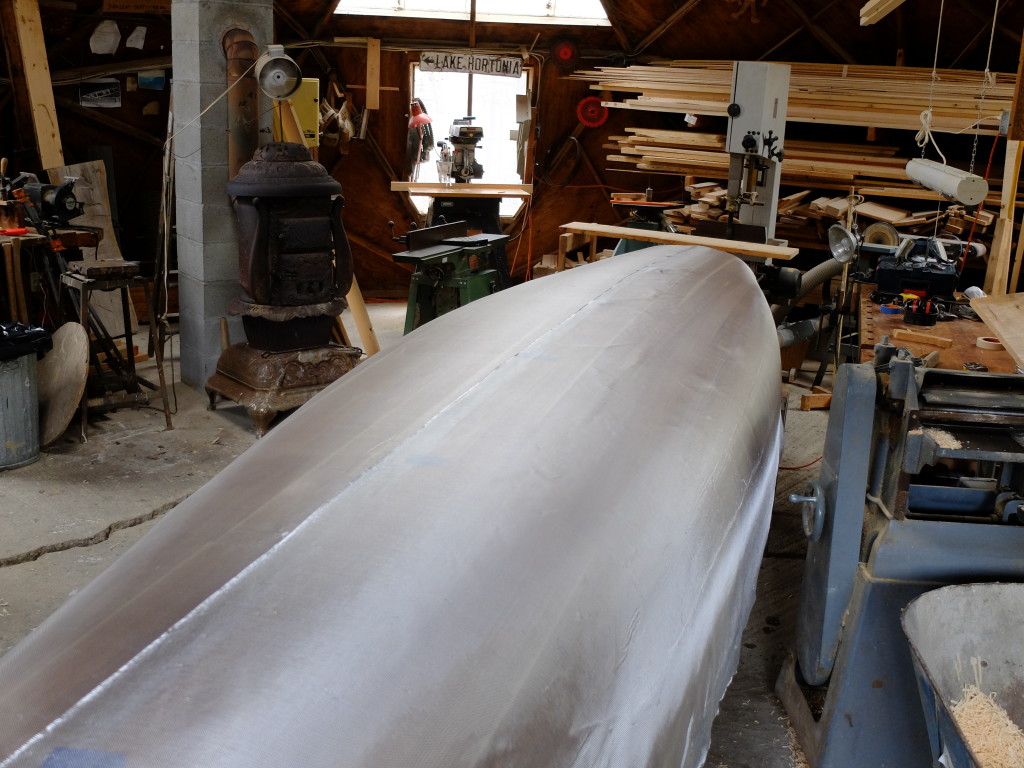
Following Nick Schade’s technique, epoxy batches were mixed and poured on, then spread with a squeegee. After they started to slowly kick, which was about 1 1/2 hours later for me, the excess was squeegeed out. See Nick Schade’s videos or Ted Moores for a description of this process. The result of the first coat :
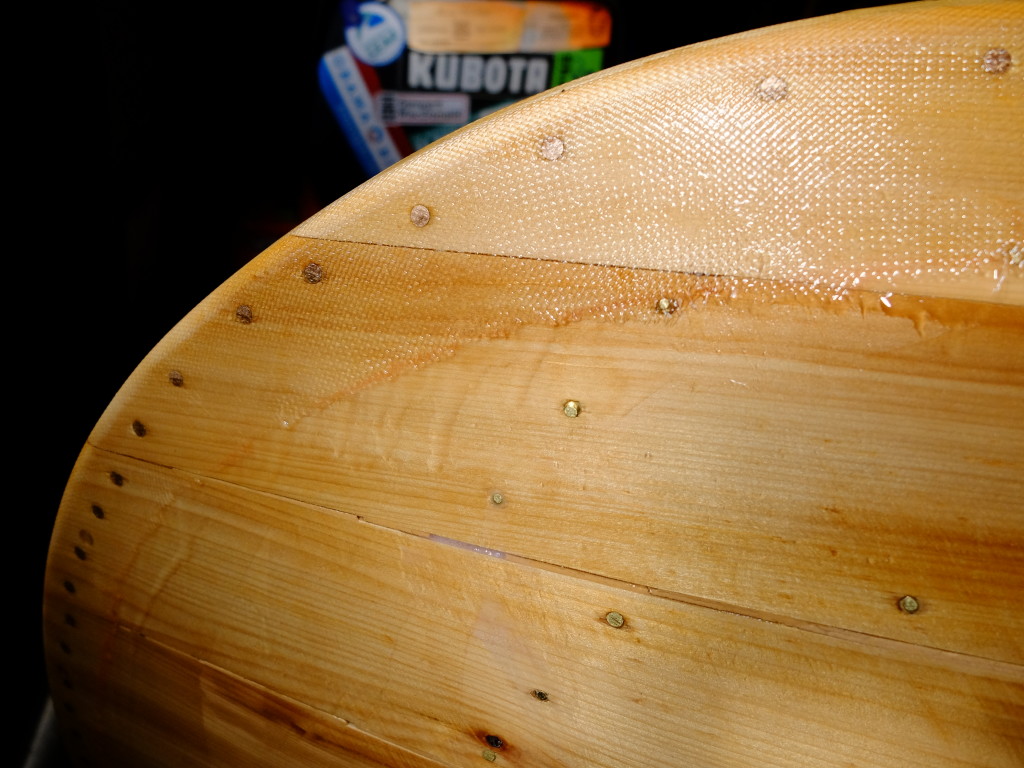
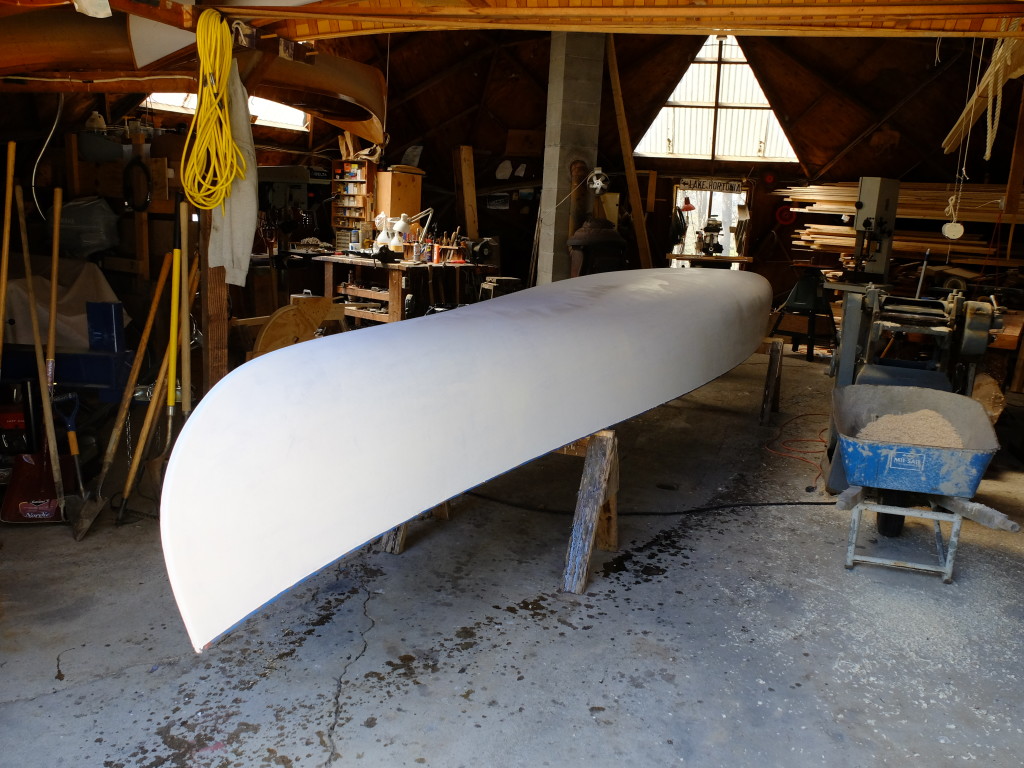
The second layer of epoxy went on the same, after trimming off the excess cloth at the gunwale from the first layer and giving the hull a light sanding to remove any nibs. The first filler coat (first of two) went on with a roller, again after a light sanding, and then was tipped off with a dry brush to take care of most of the little bubbles left by the roller.
Several components of this system are toxic and have potentially serious health consequences including allergic dermatitis, respiratory and nervous system disorders. Not all of the risks are obvious, the fumes generated during the curing of the epoxy being one example of a non-obvious hazard. Never allow liquid epoxy in either mixed or unmixed components to touch any part of your skin. Don’t breath epoxy sanding dust, especially in the uncured state, which can be for a period up to a week after applying it, and don’t breath the epoxy fumes, unmixed, but especially mixed and uncured. I have had no adverse side effects from the Silvertip epoxy, but I am using lots of nitrile gloves, taking care to keep my shop clothes in the shop, washing with waterless handcleaner, and wearing a well-fitting 3M respirator with both an organic-chemical multi-gas cartridge and particulate pre-filters. A beard will prevent an effective seal for the respirator. Continuously check the seal on the respirator – if you can smell anything, it is not working.
The second filler coat was thickened with WEST 407 low density filler, applied with a squeegee, to help control sagging of the epoxy on the many vertical faces of this boat. After letting this coat set for a couple days, I faired the filler and rolled on a coat of the Pettit EZPrime, a high-solids primer that sands easily.
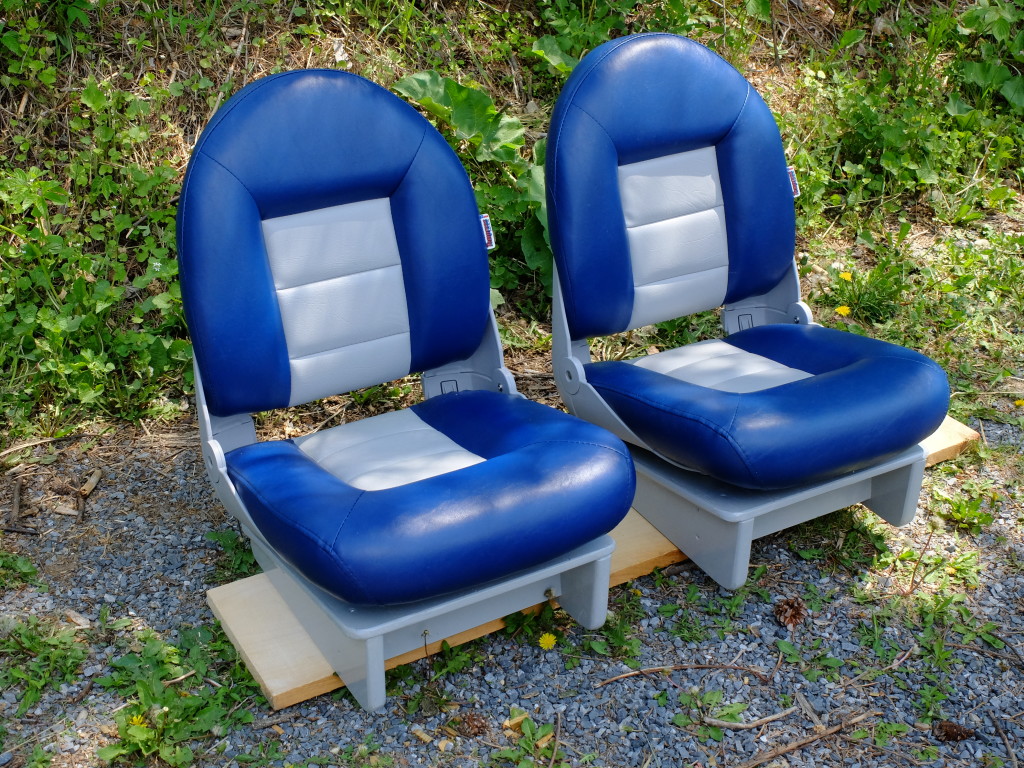
I used a skid-plate style keel made from 3/4″ white oak that narrows to 1″ wide at the stem and widens to about 3 1/2″ in the middle ending up around 2″ at the transom. This was fastened every other rib from the inside with stainless screws. The outside stem was bent on a form from white ash, scarfed into the keel piece, covered on its face by half-round brass stock fastened with #4 x 5/8″ screws. The brass band was carried about 3′ back along the bottom of the keel. Finish paint was Epifanes Yacht Enamel which I liked very much – dried hard and quickly with very little tendency to run when applied with a high density foam roller. Two coats, each one thinned a little with Epifanes brushing liquid. The seats are Empress Navistyle highbacks, mounted on wooden bases that let me move them around.
Fitted to the trailer and ready for first launch.
