I knew I would have a storage problem with this boat, and took a couple weeks to add on to my boat shed to make a place to keep the form and the finished boat.
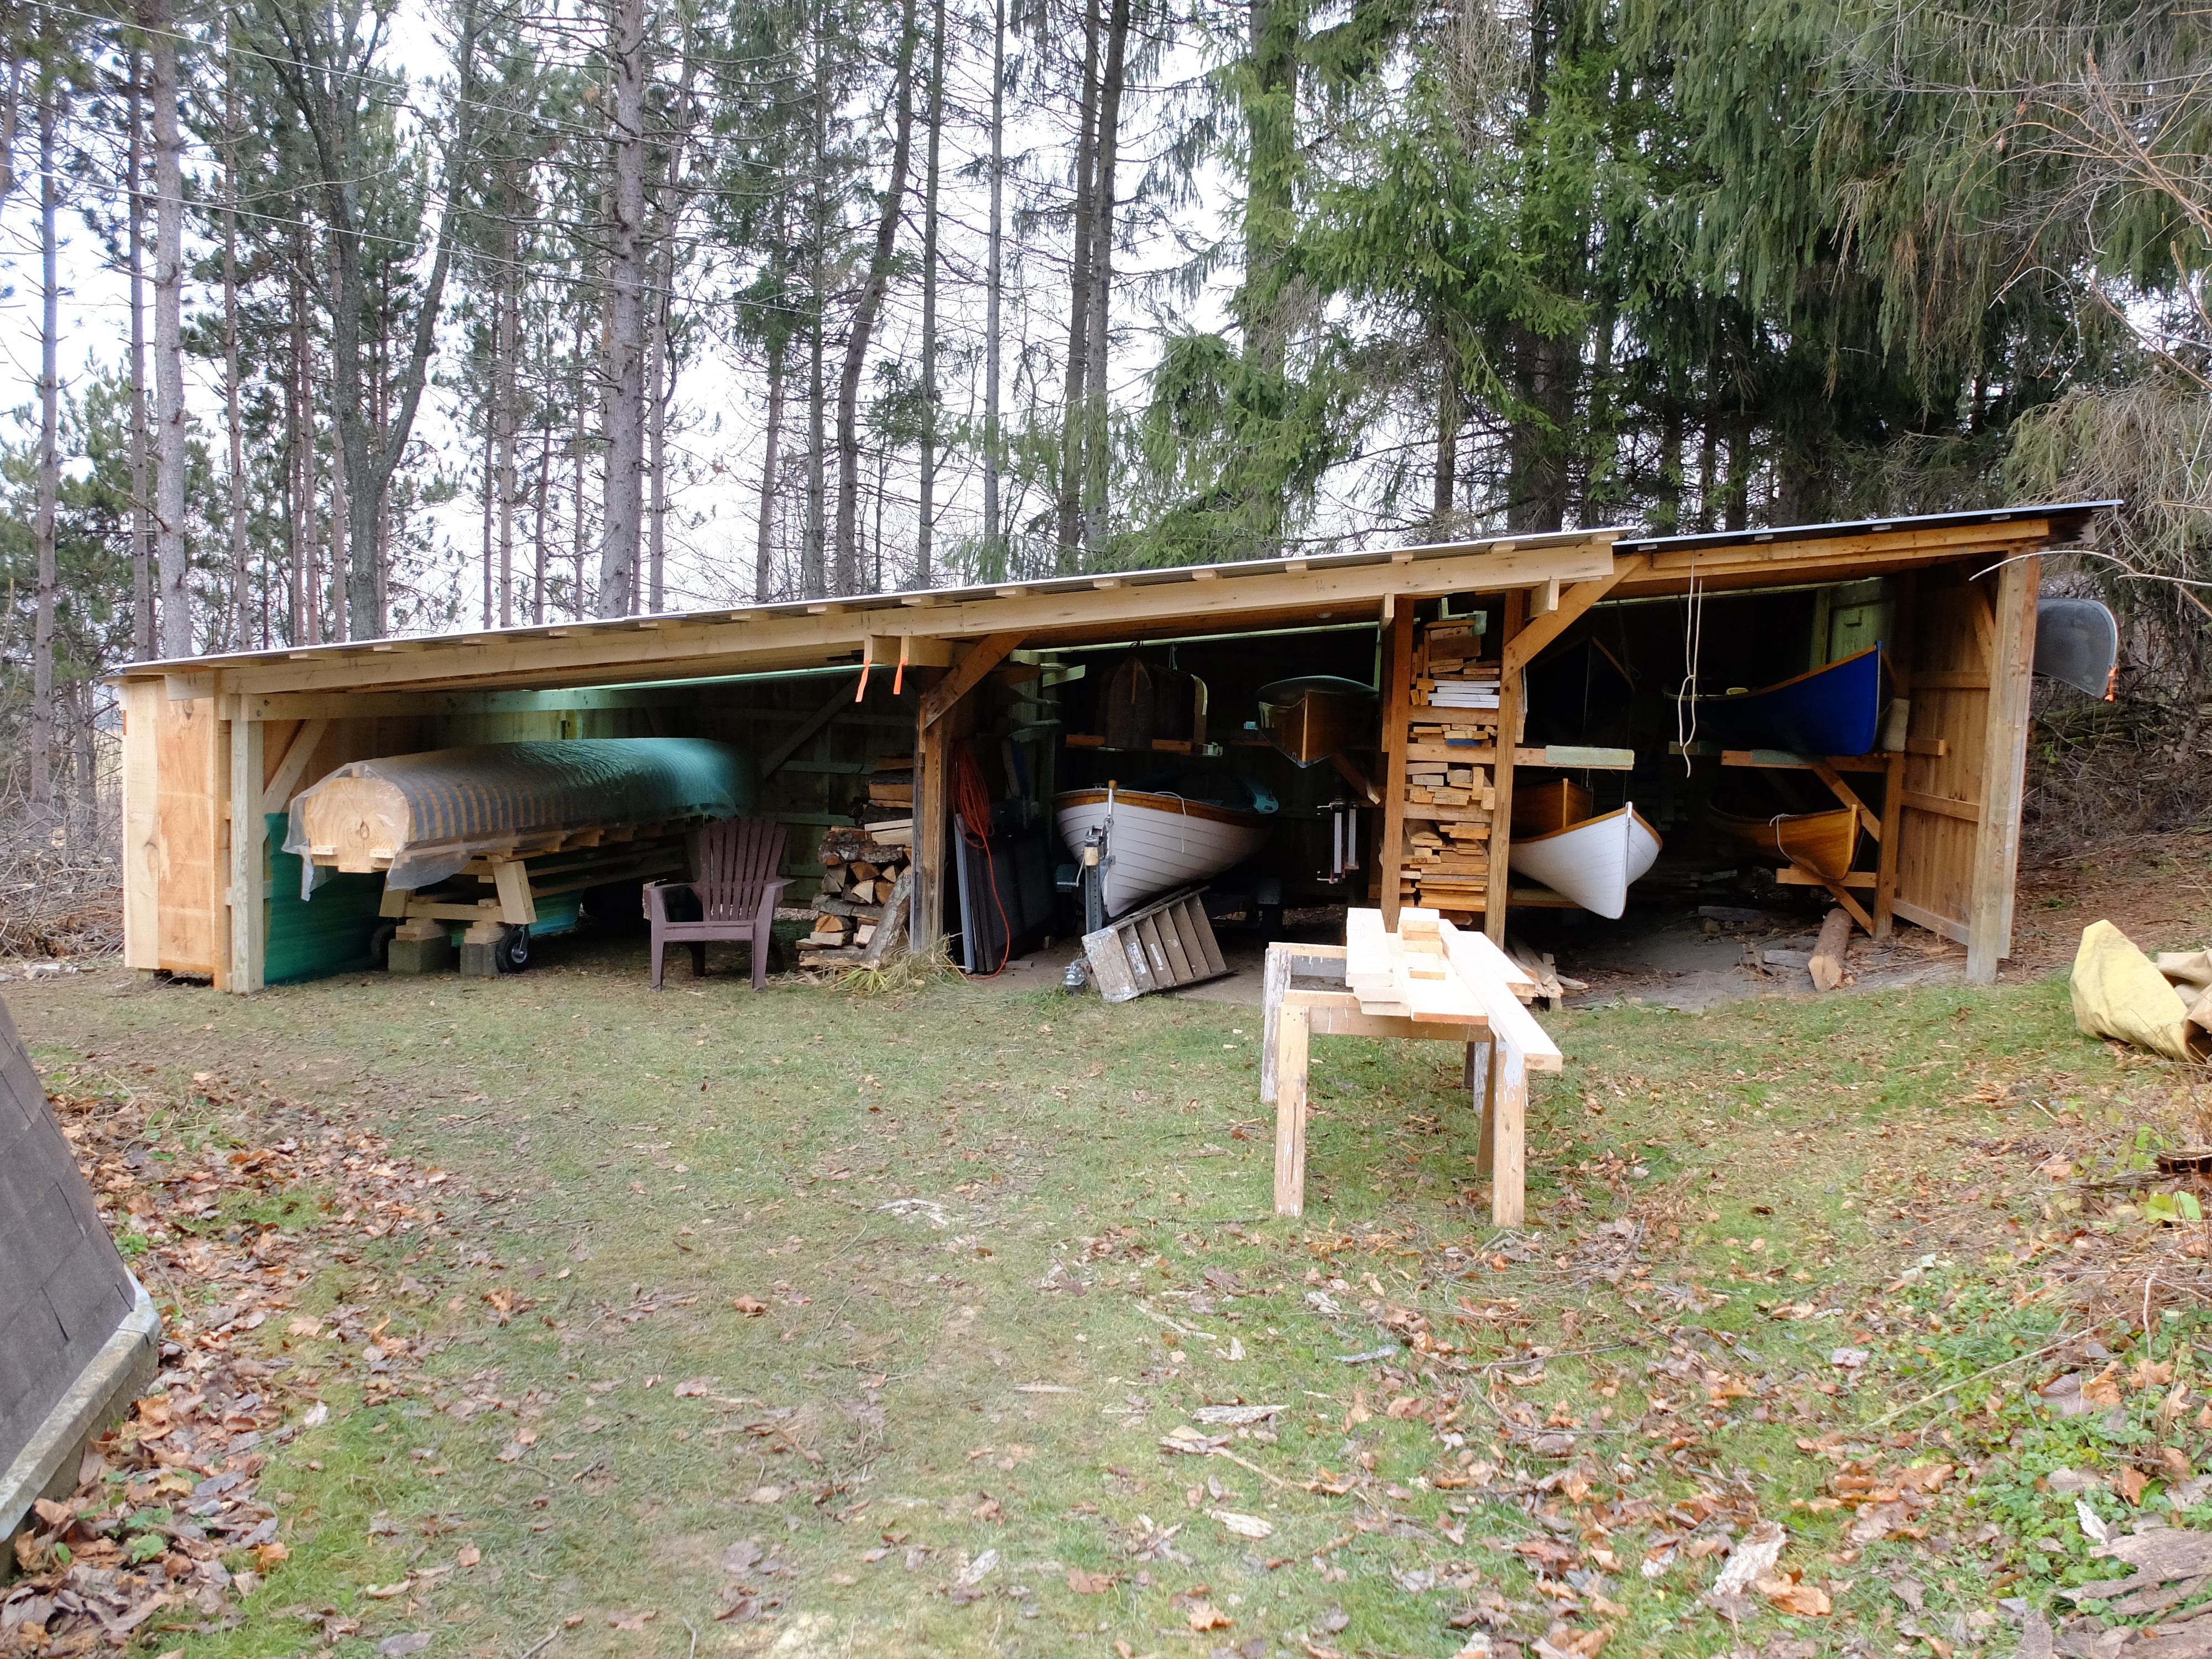 The two bays on the right were the existing shed – I still had enough headroom to continue the roof downhill another 12′ for the addition. Boat count : 3 guideboats, 2 Rushton-design solo canoes, a whitehall, a Winona and a Grumman. Plus 2 guideboats, 3 canoes and the new Big Guy in the garage. I need to talk to my marketing rep.
I thought winter was coming and rushed to get the shed done and put up some firewood, but it is still mild here (December 13). I was able to resume working on the boat this weekend.
There were 5 half-ribs to put in the locations where the form backbone bolted on, plus 4 pairs of cant ribs in the bow. The cant ribs get thinner as they approach the bow so that the planking will lie flush at the stem. They go from full 3/8″ to 3/16″ closest to the stem. I upgraded my steamer burner to a 54,000 BTU King Kooker outdoor cooker made for Cajun-style cooking – what a difference. It blew the lid off my kettle in 5 minutes. It takes a helper to clench the tacks on the bottom of the boat – or, an orangutan.
My method of joining the stem and inner gunwales uses a chunky mahogany block as a knee, screwed to the stem and through-fastened gunwale-to-gunwale. The projecting top of the stem gets cut off later. The last of the cant ribs is visible.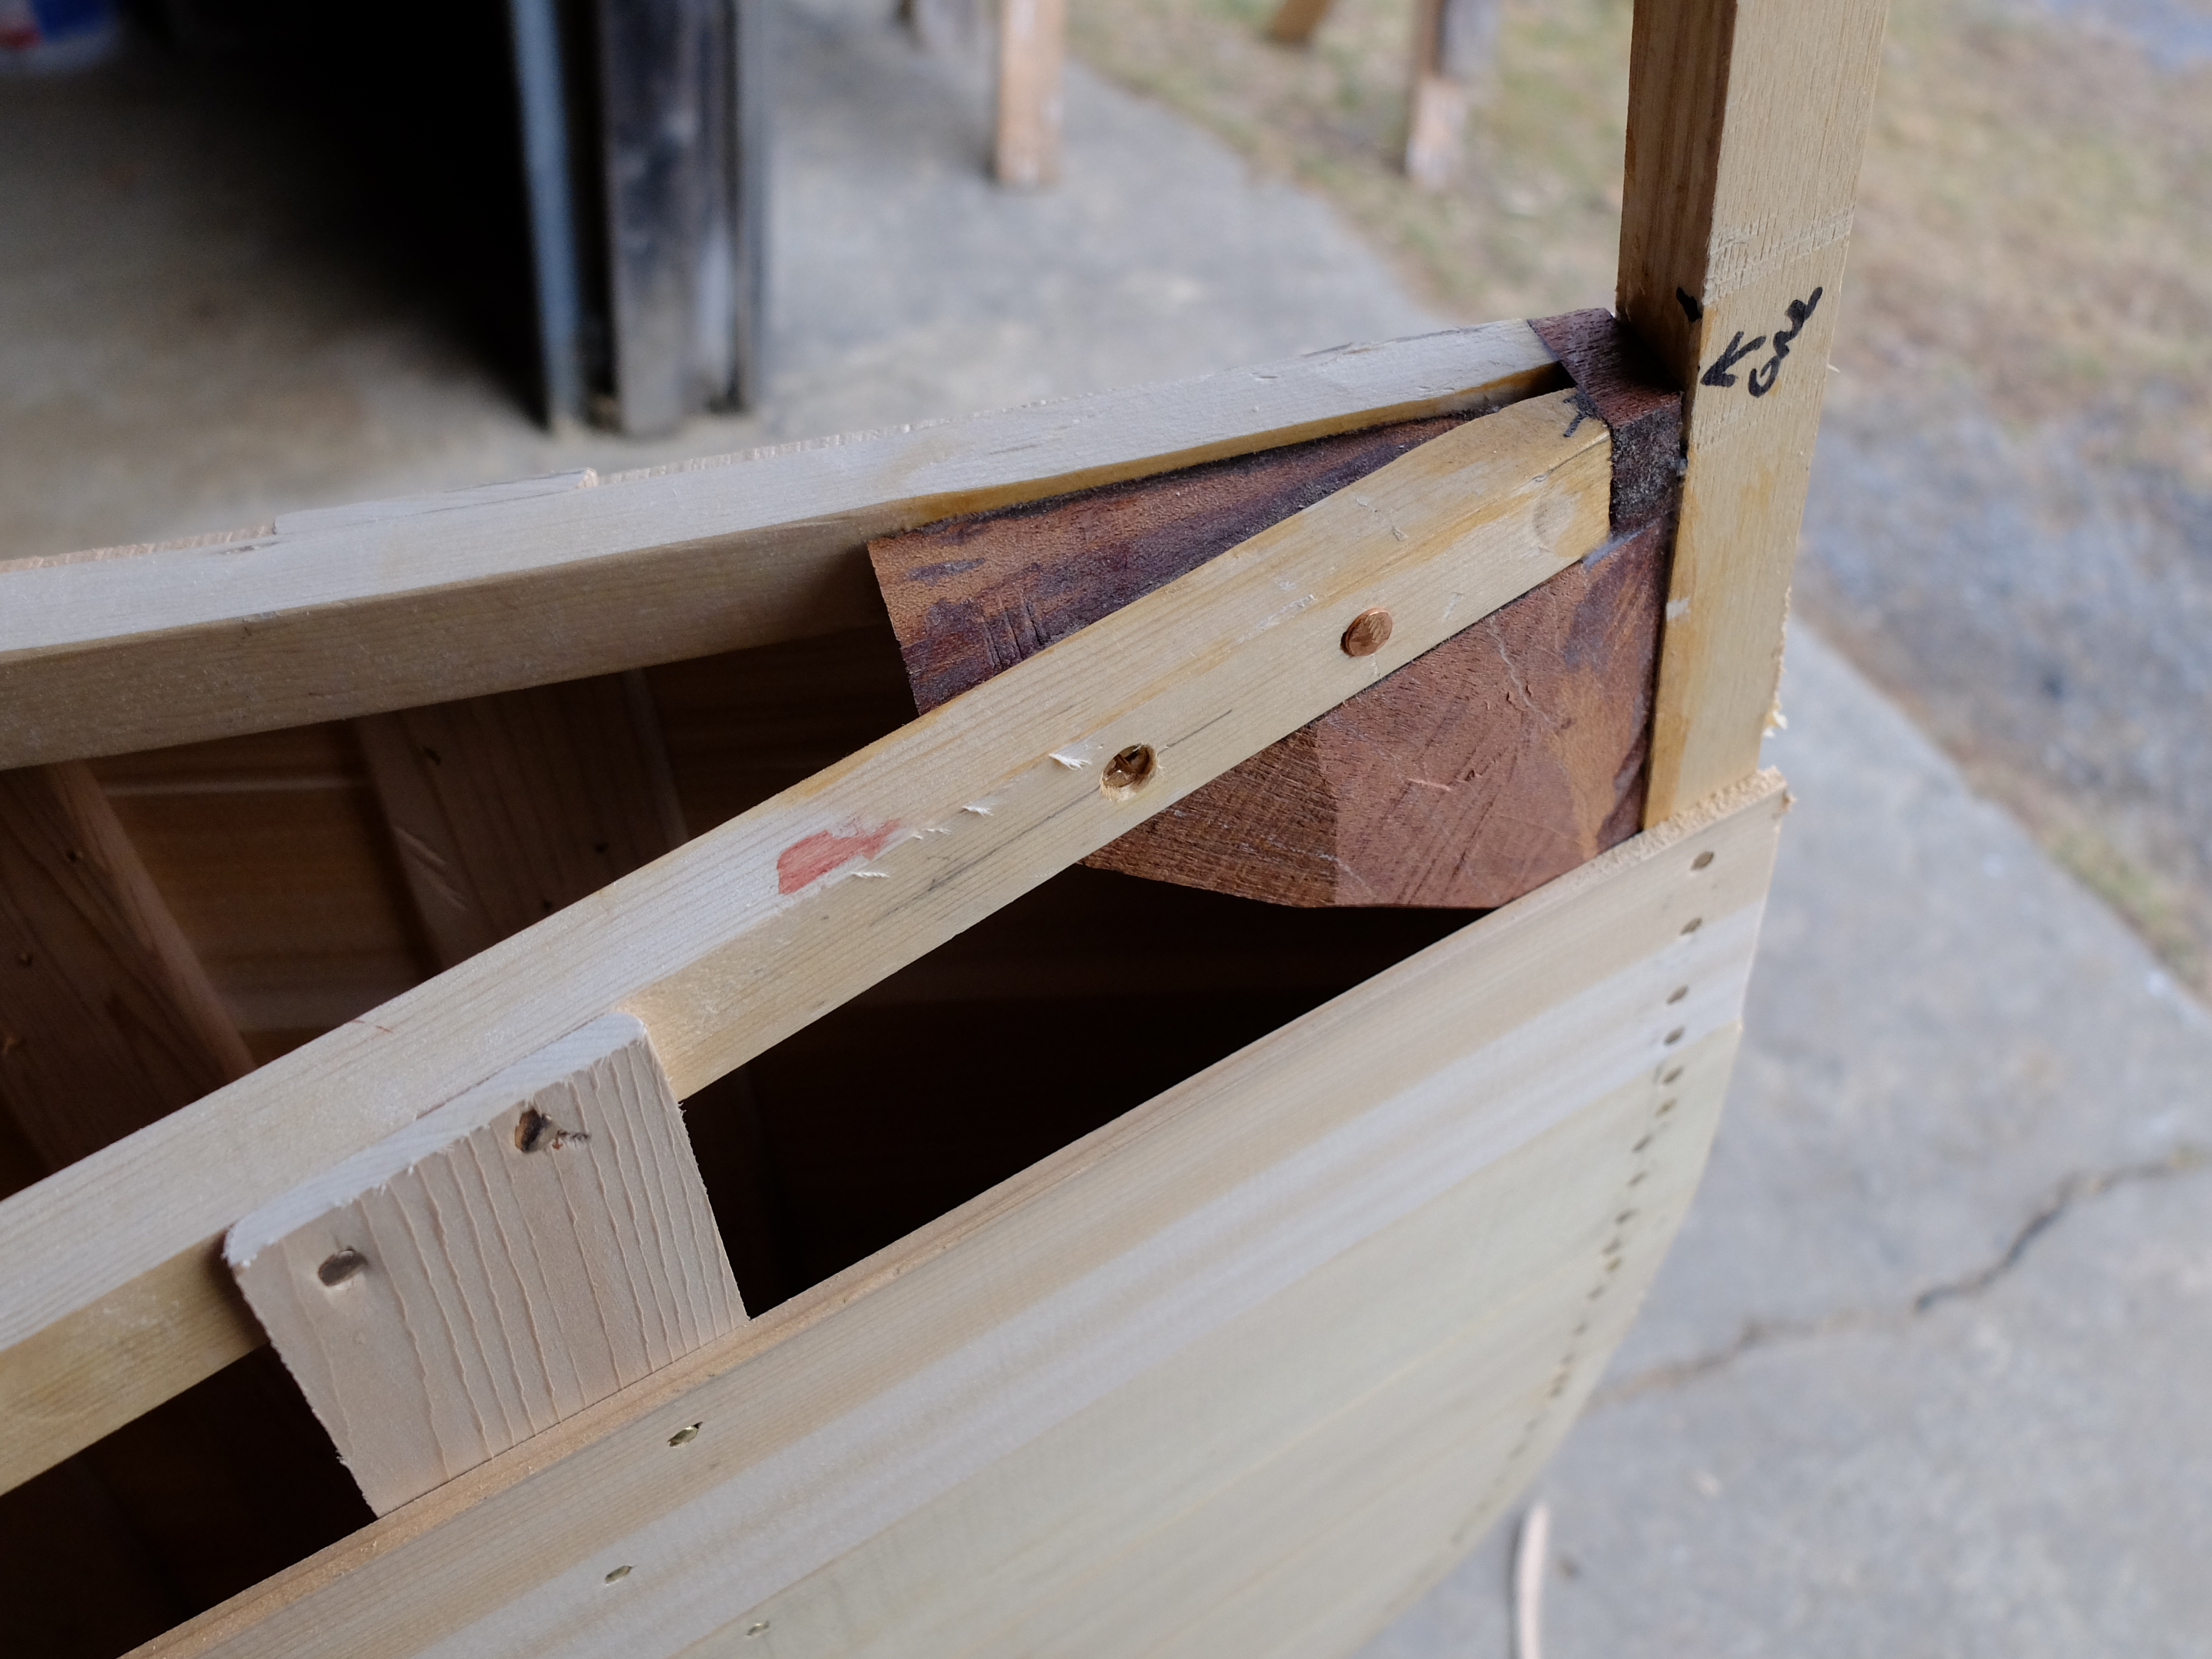 The 4 pairs of cant ribs –
  The deck is made from a solid piece of black walnut. I know black walnut is supposed to be bad luck in boats, but I don’t care. I have some nice walnut my brother-in-law Fitzie traded me, and I use it when I can. Besides, mahogany is way too expensive and scarce. I cut the underside of the deck to capture the edges of the gunwales and cover the knee at the stem –
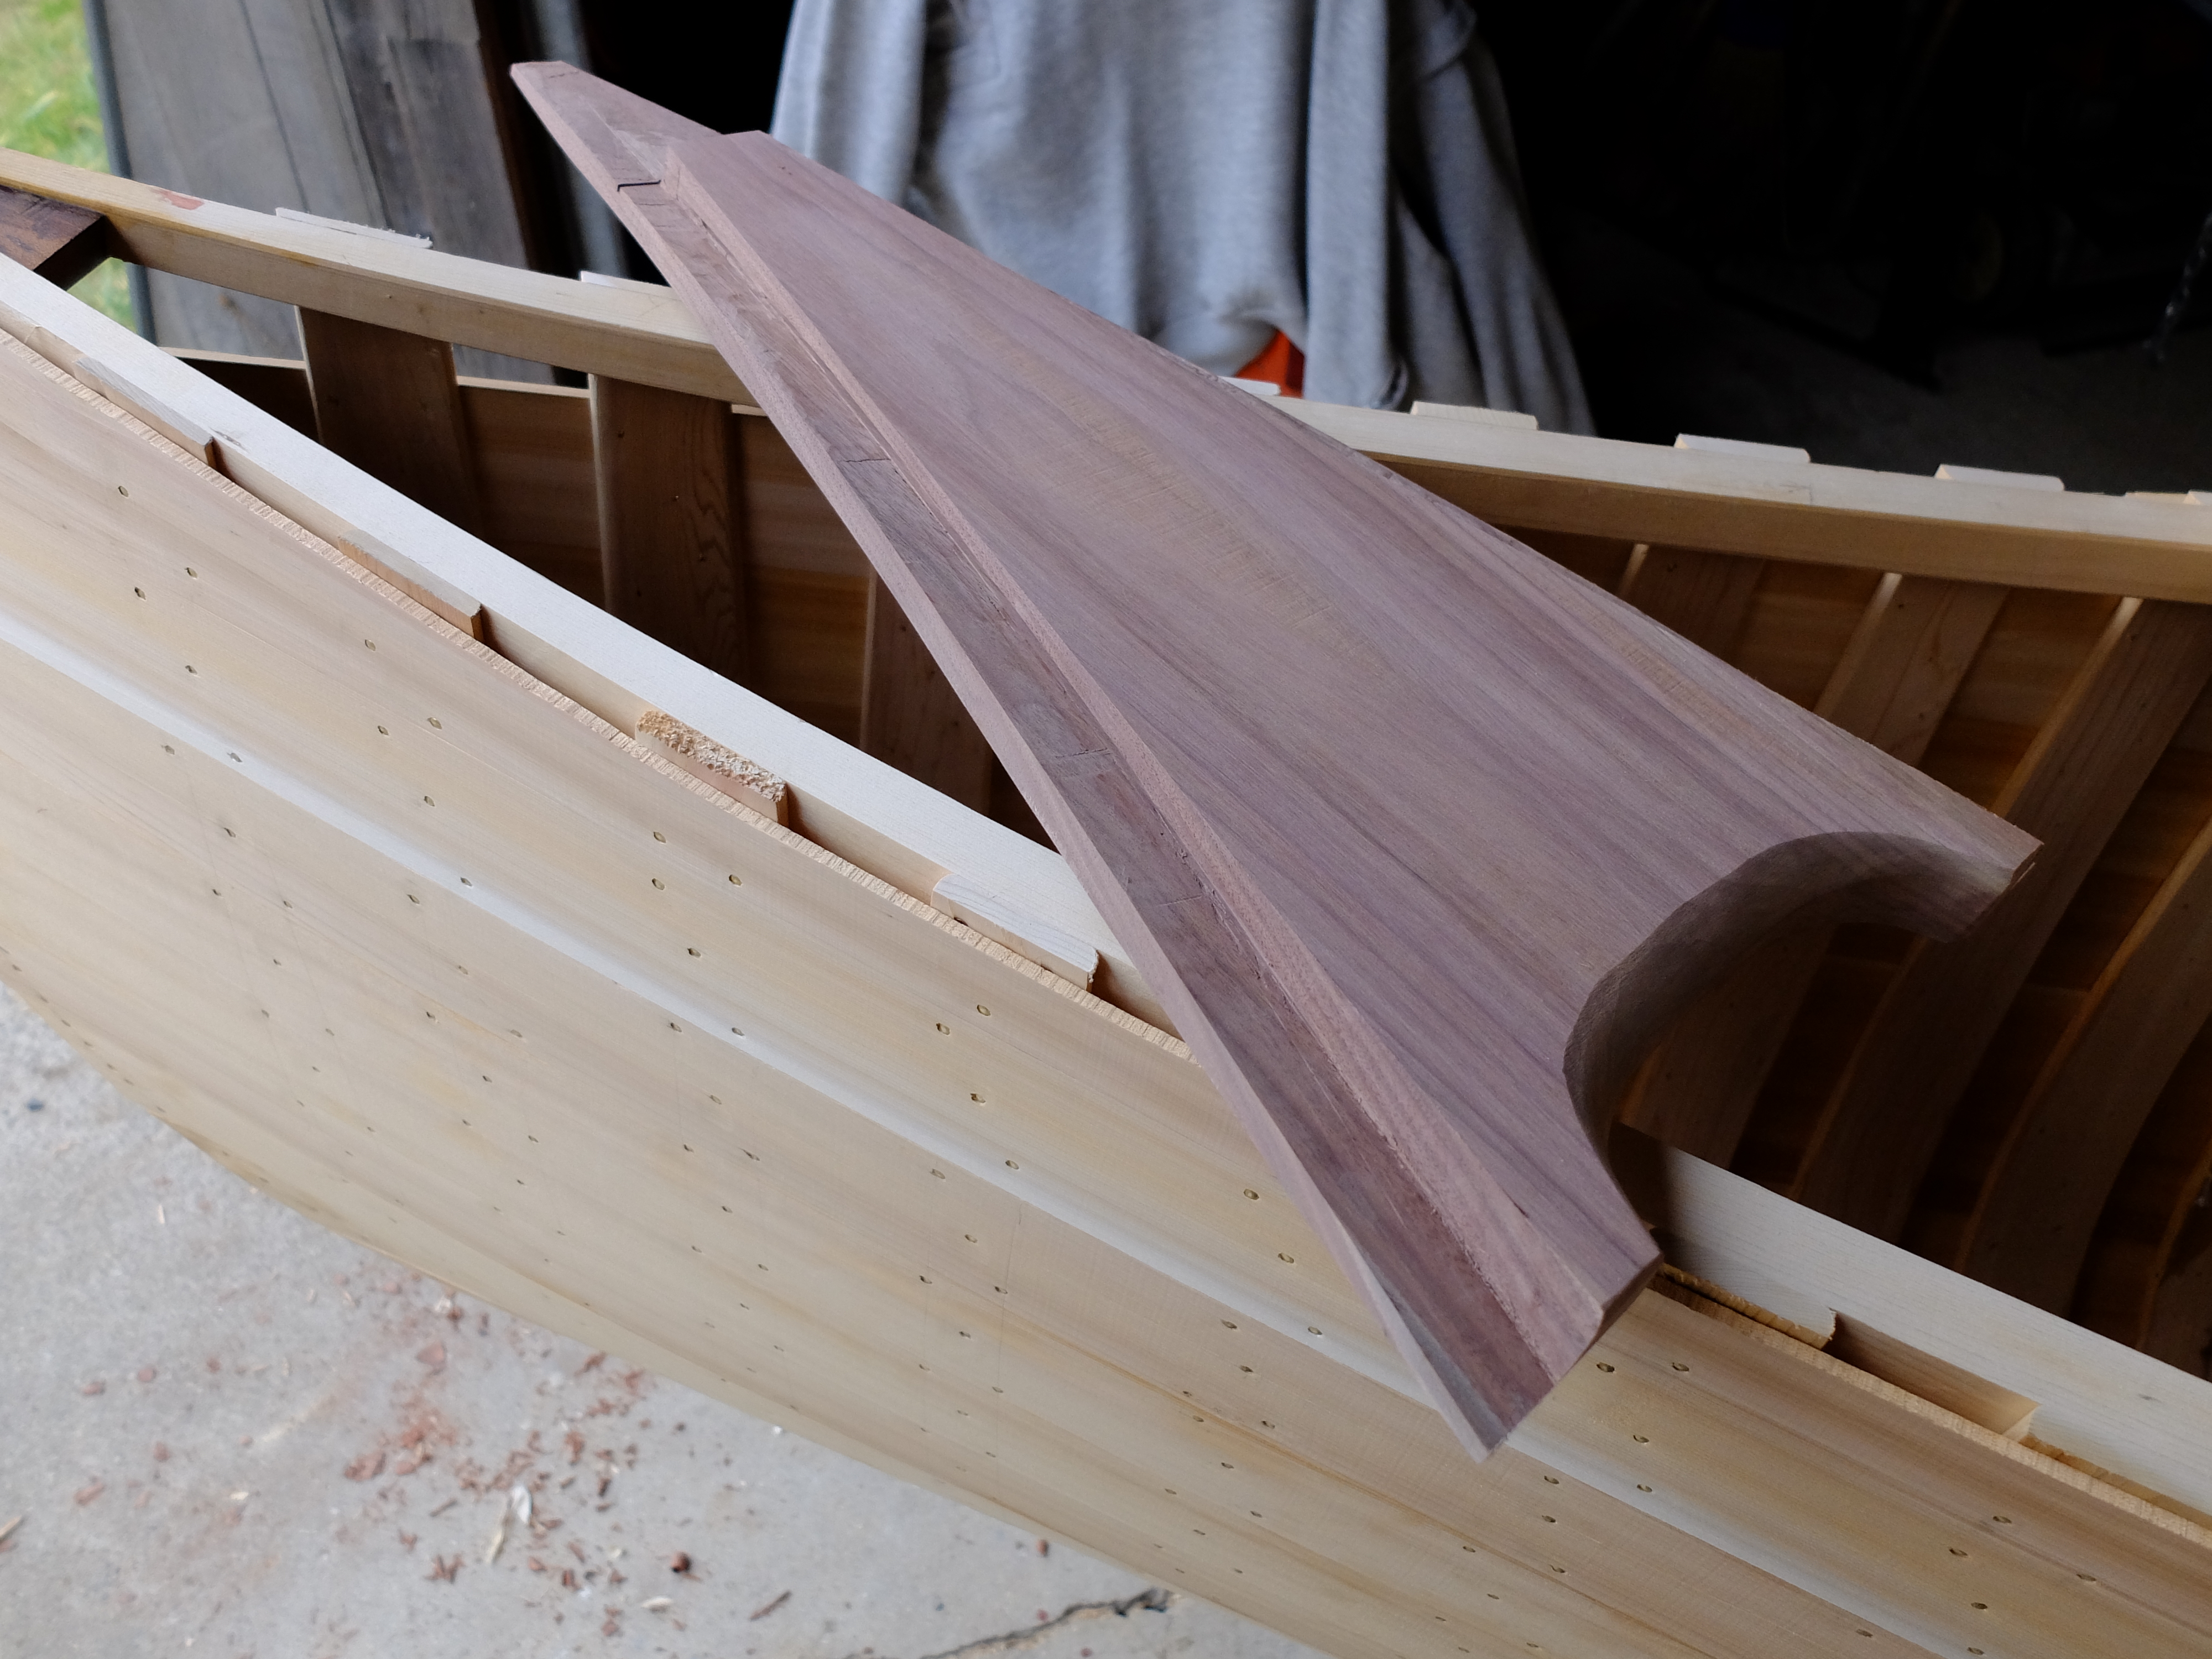
This is how it looks installed – it sits on top of and inside the gunwale. I’m going to screw it down into the gunwales and glue it with epoxy. 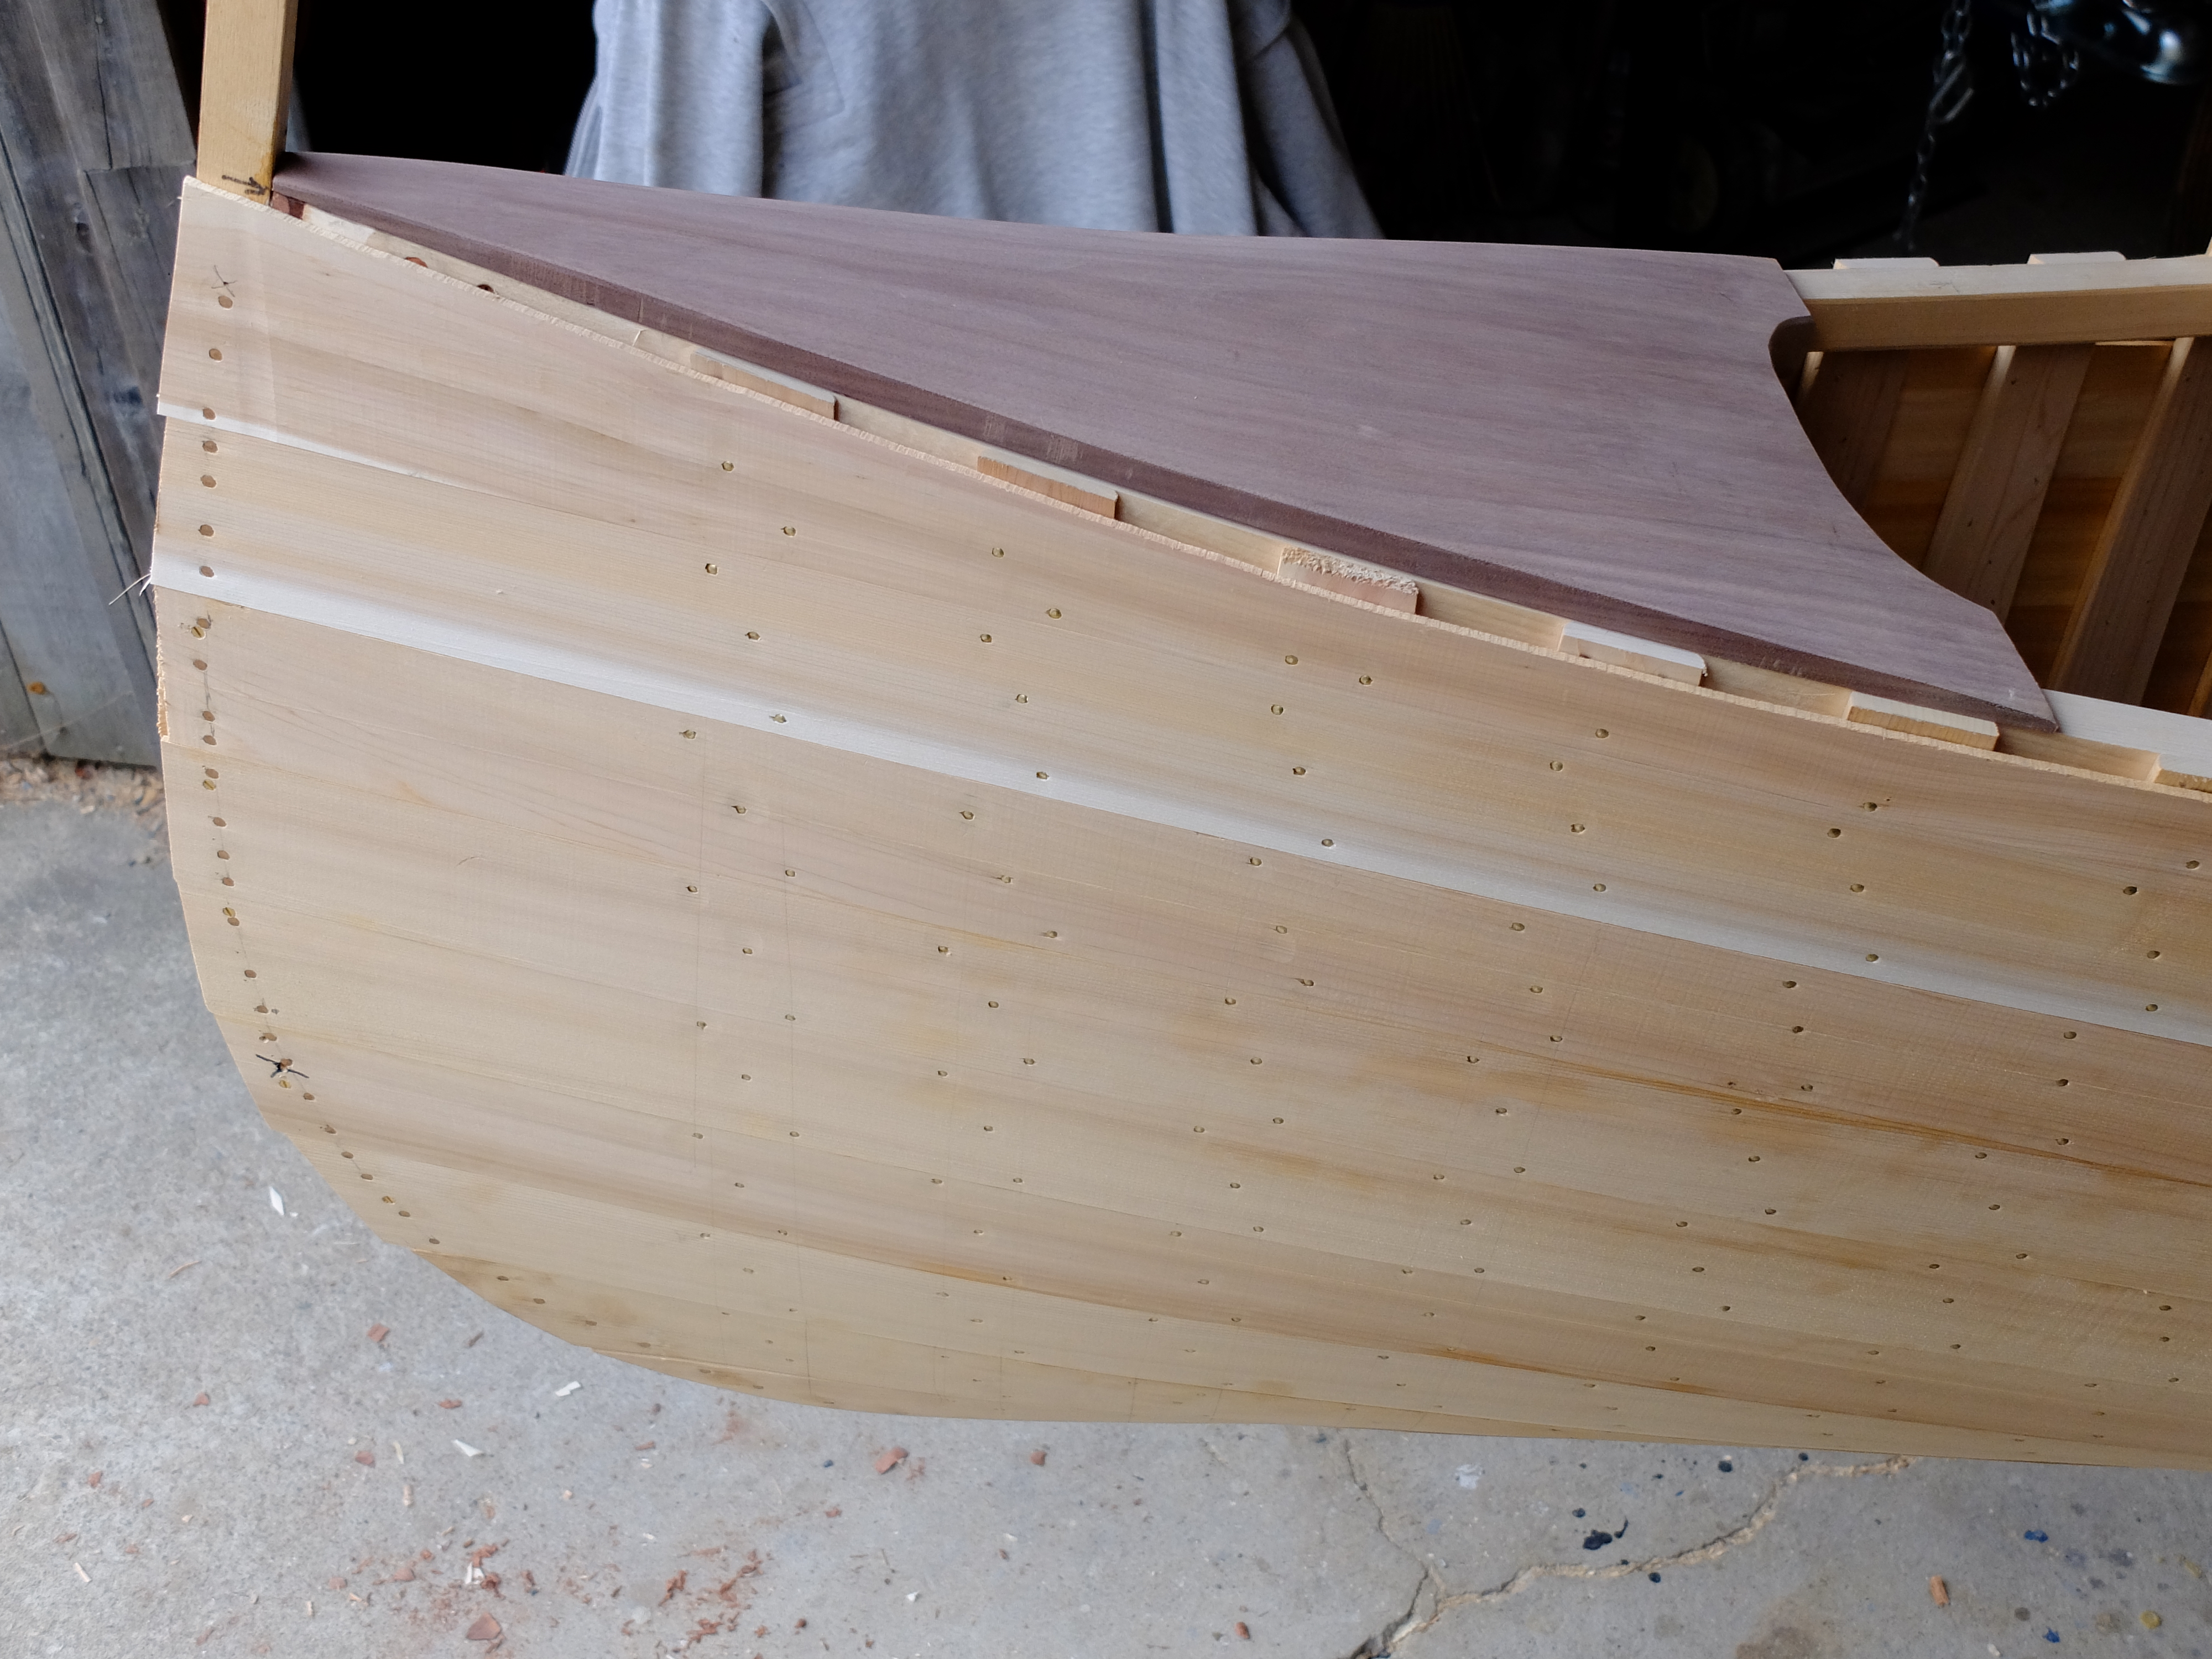 It goes without saying that a lot of decisions get made in a project like this. My last building remark should have raised an eyebrow or two from purists. I am well aware that being able to disassemble a boat for repairs over the long haul is a consideration some give high priority to, but my tendency is to focus of keeping the boat together and worry about getting it apart later, if ever. This whole boat (at least, the outside of the hull) is getting encased in epoxy and fiberglass. I think gluing on the deck keeps water out of the deck/gunwale joint and stiffens the whole bow section considerably. I plan to epoxy as well as bolt the thwarts to the gunwales for a similar reason.
I have spent a lot of time lately gleaning information about the Grand Laker canoes from any source I can find. One thing is clear, that for the builders in Maine around Grand Lake Stream, they were not averse to adopting new materials that were an improvement over what was previously used – like the use of fiberglass instead of canvas to cover the hull once the lead went out of paints. This decision, almost universally adopted by the Grand Lake builders, is still controversial to ‘purists’. Do the builders in Maine now glue in their decks and thwarts? I don’t know, and I don’t want to ask. I have encountered with them an interesting form of reticence that makes it impolite to ask too many questions. I have a couple contacts up there who have been helpful with pictures and tips, but there is a history of independent living and self-sufficiency among the past and present builders that makes sharing design and construction details too personal. I found an article in the May 1994 issue of Field and Stream by Jerome Robinson about the Grand Lakers. He found it almost impossible to even buy one – how much to they cost? Can’t say. Can he order one? No – don’t want to be bound to a time line. Could he make a down payment to hold one? Nope – don’t want to hold somebody else’s money. But lo and behold – the next spring one had been built for him and was ready and waiting. Robinson goes on to say of the builders, being self-sufficient and resourceful, ‘they’d sooner die than ever talk to each other about how they build canoes’, that they’d be out on the water all day and study each other’s canoes but never discuss materials or techniques or how much to charge, each man would figure it out for himself. Jerry Stelmok (and Rollin Thurlow) in The Wood and Canvas Canoe say the Grand Lake builders worked independently and never developed a single strong canoe company, each man using canoe building to supplement his income as a guide.
The foregoing tends to explain why it has been difficult for me to get construction details. I recognize that I am going against this tradition by writing up my building experience. But I see no reason (there may be a good reason I will see later) not to share what I have tried, and what I learn. There are very few builders of these boats now, and whatever my production is, it won’t be a threat to the real builders in Maine. I hope I don’t lose their respect by passing on what I learn from them and what I try.
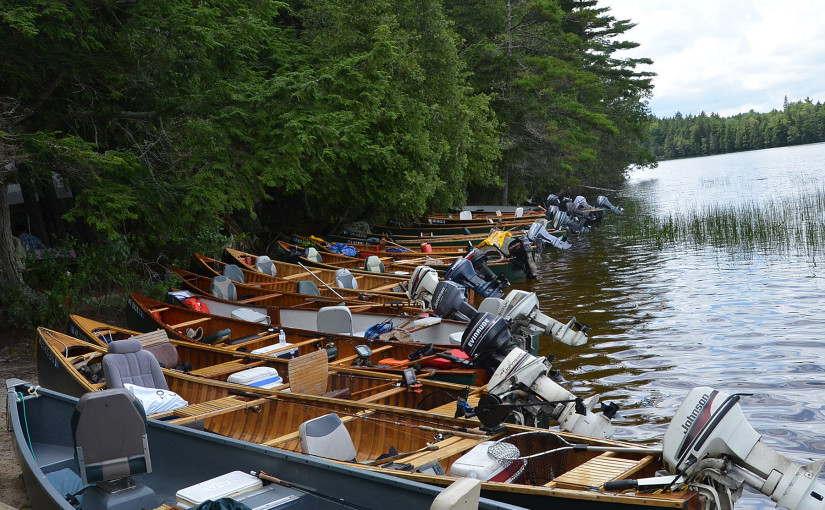
Which brings us to thwarts. Where do they go, really? And, why do I want to glue them in? This picture, from Mike Remillard, gives a good idea of the options for seating and thwarts – 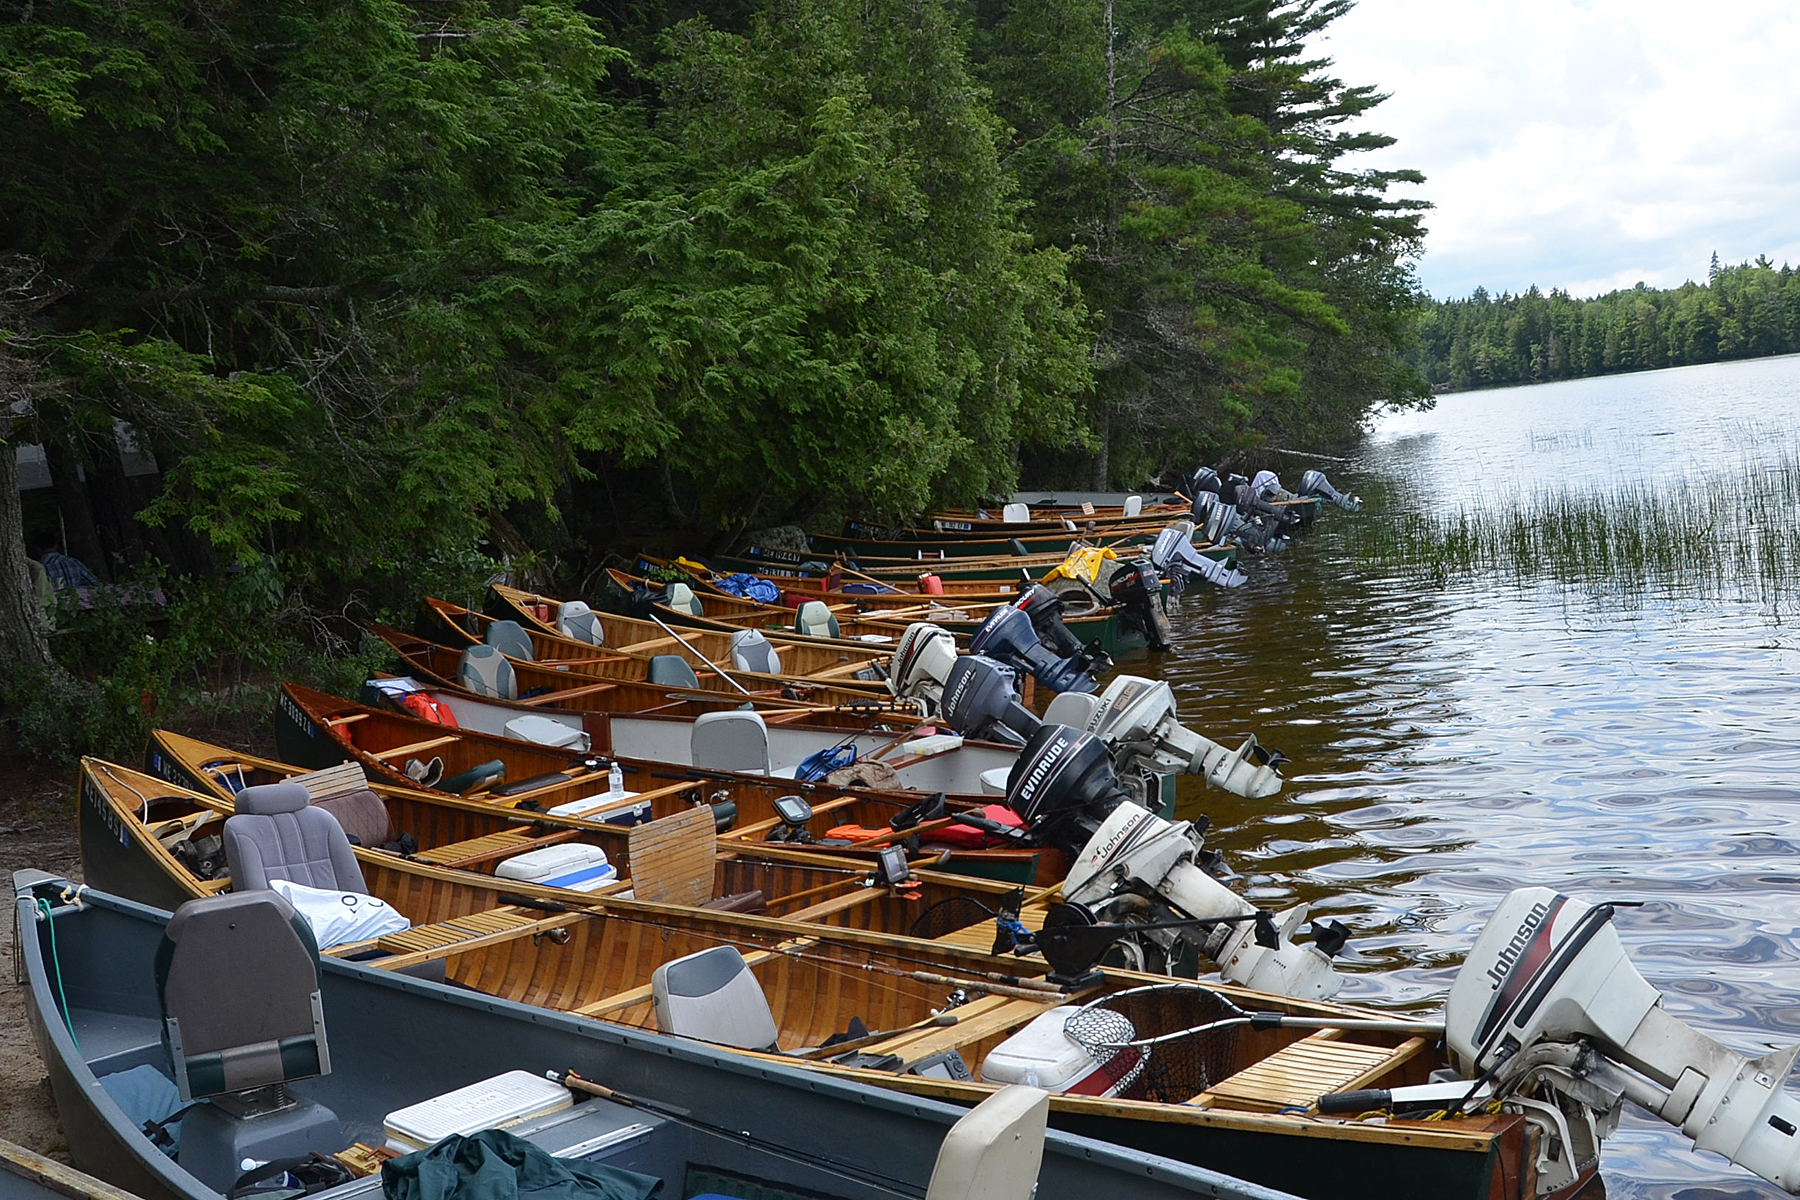 Almost all the boats are set up for 2 fisherpeople, and the guide. The guide’s seat is always a canoe-style seat set just below the gunwales, and the seats for the sports are generally automotive/powerboat-style, facing backwards for trolling. Two of the thwarts, those facing the sports’ seats, are wide enough to sit on for casting. On some boats those wide thwarts have short lips on the edges so the thwarts also act as a place to keep things like a beverage container on. A smaller percentage of the boats are set up with the sports’ seats facing forwards. I spent some time trying to scale the thwart locations off images like the one above until I realized I could use a rib count to find the distances between thwarts – ribs are generally 4″ on center. Fifty-four ribs between deck and transom = eighteen feet, plus two feet of deck = twenty feet. This picture of a Dale Tobey boat at Paul Smith’s College at a WCHA gathering was very helpful – I get about 7 ribs from the transom to the front of the rear seat, 9 ribs rear-seat-to-rear thwart, 11 ribs between each of the next three thwarts, 6 ribs to the deck, and roughly 6 ribs to the stem. This translates to 28″ transom to front of rear seat, 36″ to rear thwart, 44″ between each of the main thwarts, 24″ to end of deck, and 22″ of deck. This adds up to : 242″, or 2″ over 20′ which is the assumed length of the boat. This is close enough to work with.
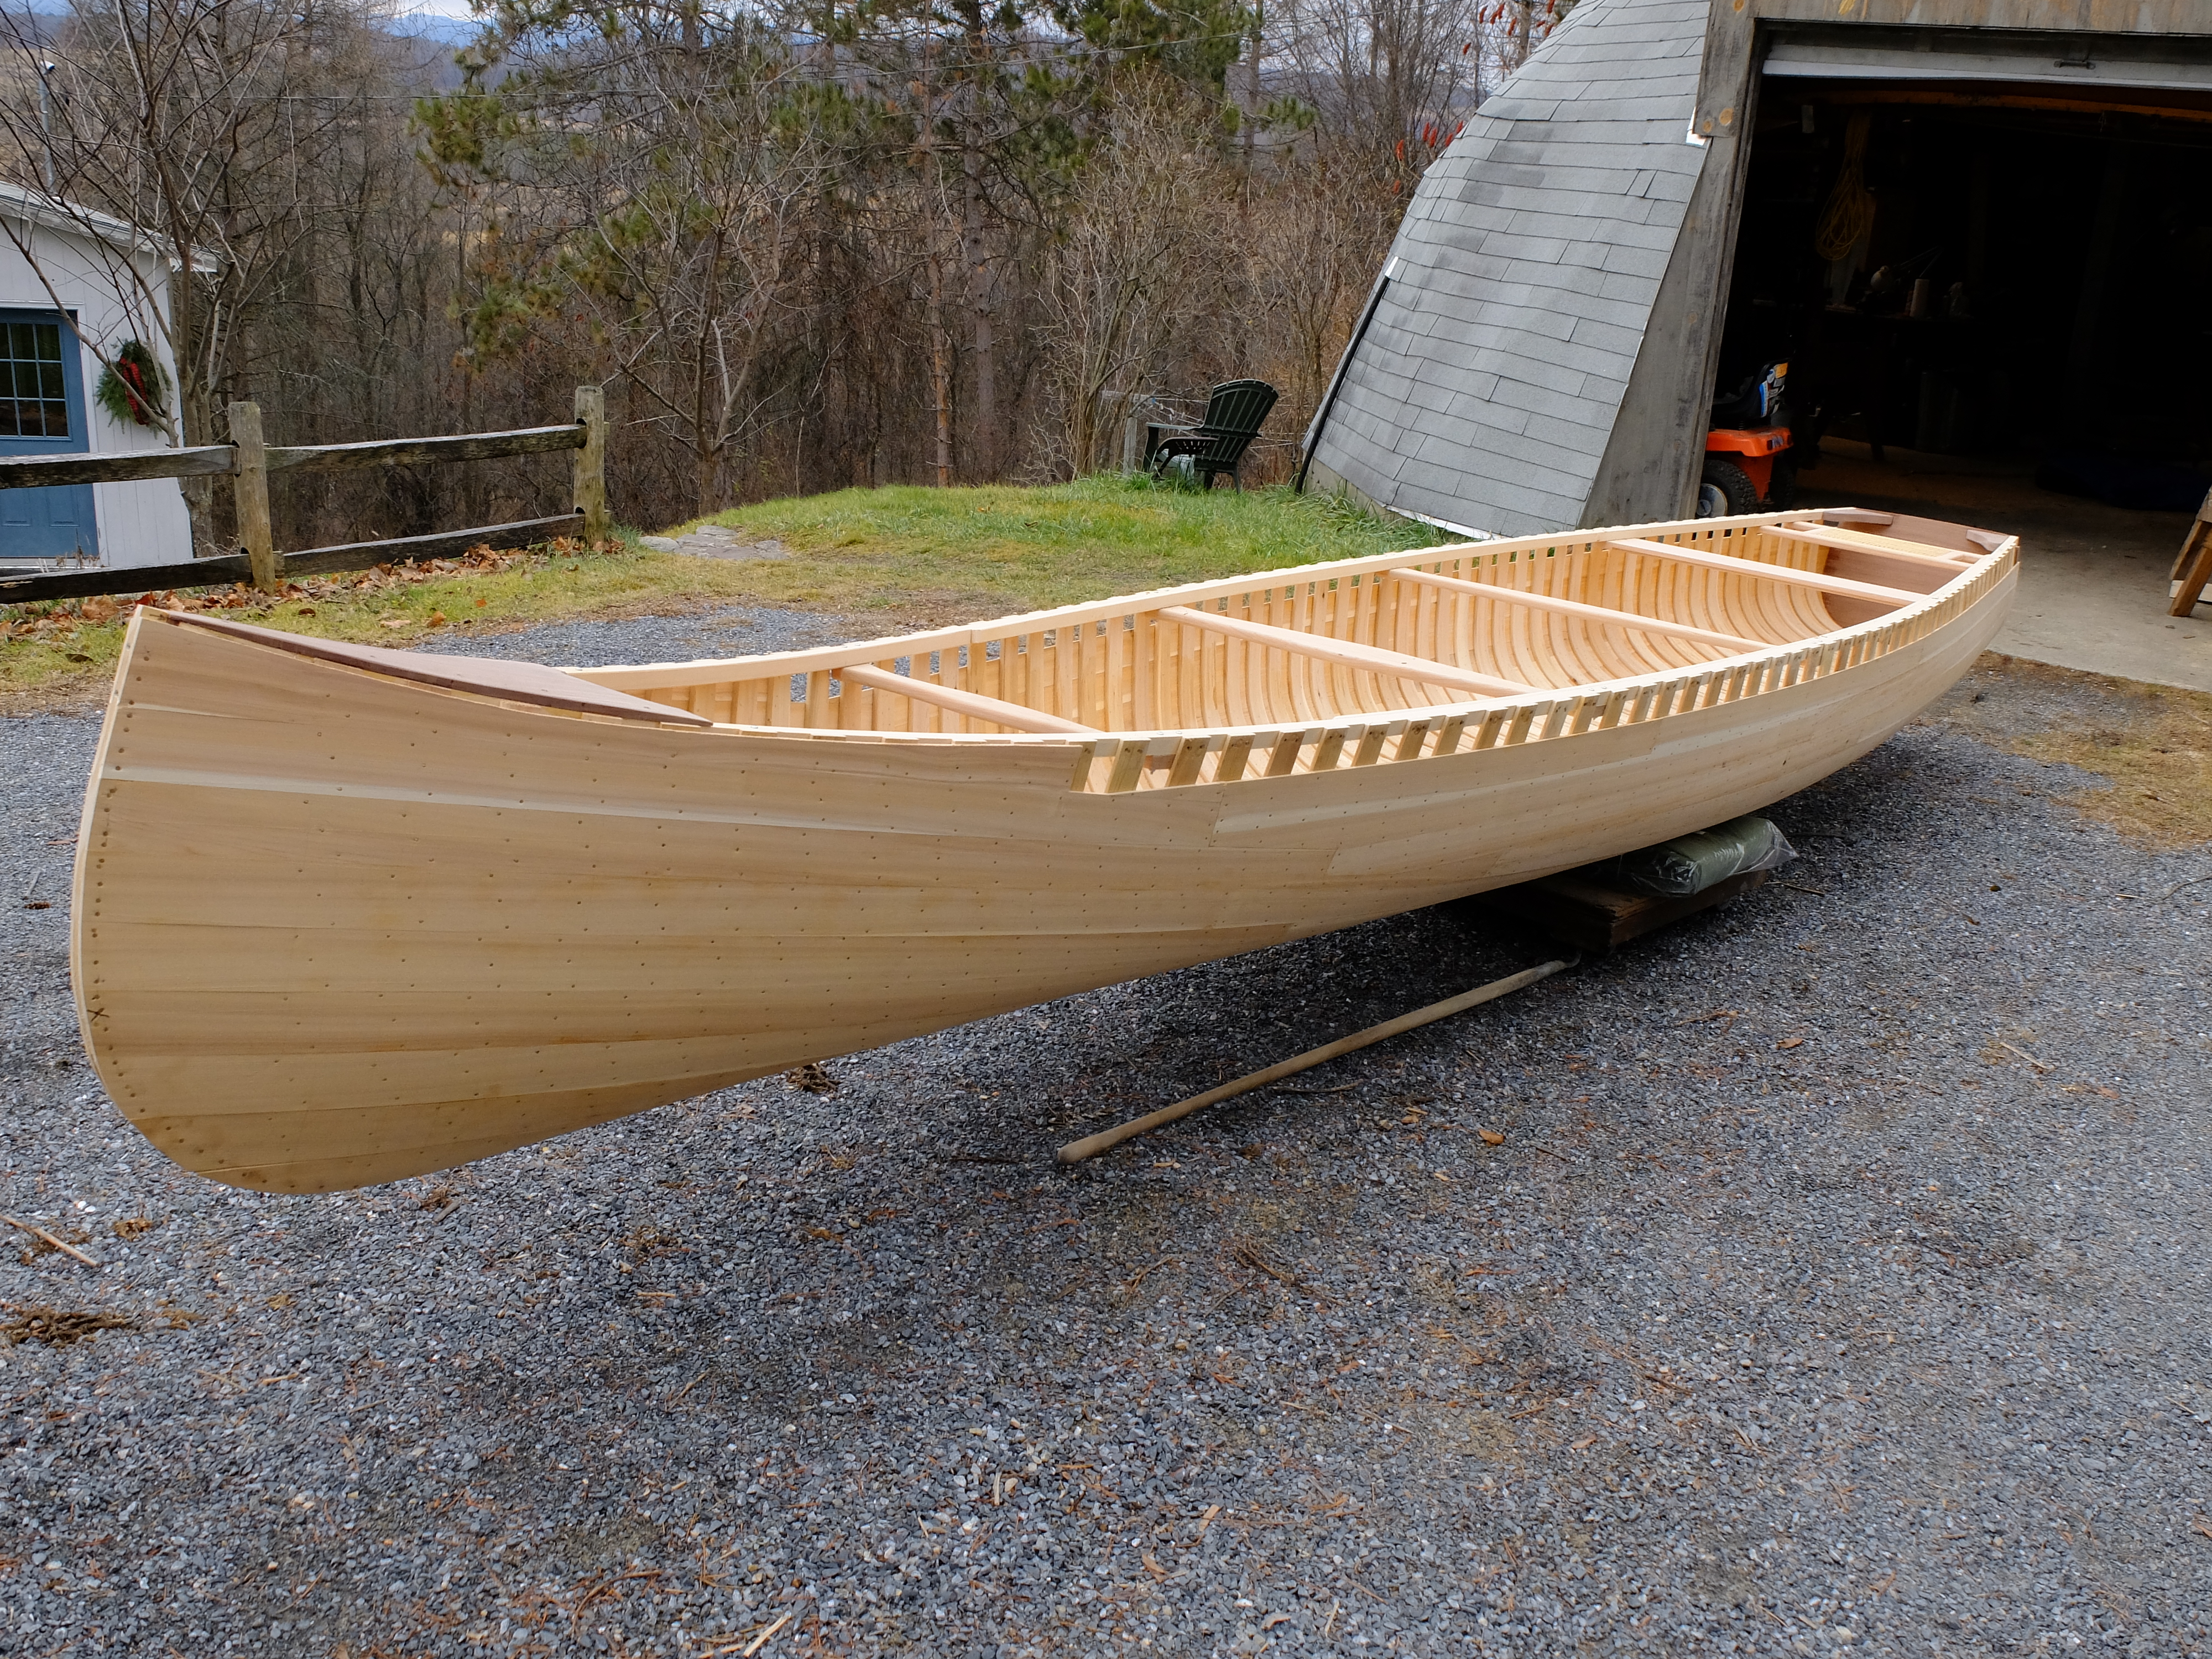
 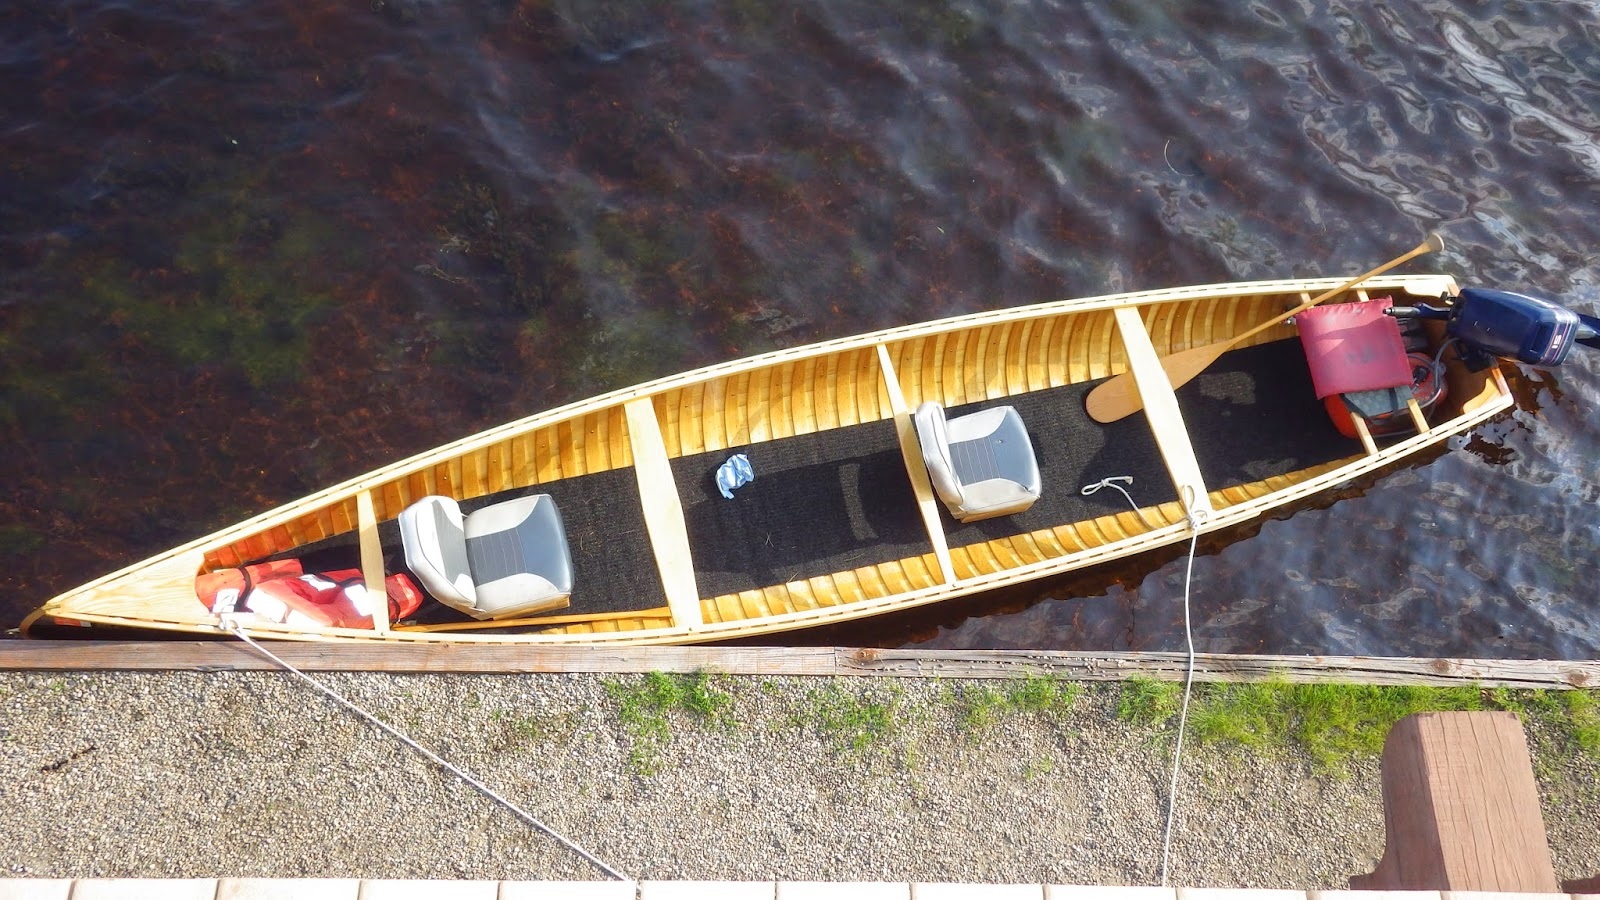 I followed that basic layout, using black cherry for the thwarts and seat frame, and machine cane for the stern seat. The after-most thwart is just a 6″ wide plank suitable as the ‘beverage platform’. I dragged the boat out into the driveway to have its picture taken. Next – finish the planking and clench all the tacks.